
I do love my chemicals, and it might be time to add a new one to the collection: https://en.wikipedia.org/wiki/Dichloromethane 35 nzd for 5 litres. Hmmmm.
EDITs:
Doesn't sound too bright, but gives a few good tips all the same: https://www.youtube.com/watch?v=MgH6zv0kfX0
Kiwi guy, normal paint stripper: https://www.youtube.com/watch?v=xUJ0_4BkwZ0
B17 as used in various videos on youtube: http://www.bencosales.com/powder-coatin ... g-stripper
A video: https://www.youtube.com/watch?v=xgYFlzKdYDM
Details: http://www.bencosales.com/pdf/B17-Specs.pdf
MSDS: http://www.bencosales.com/sds/B17-SDS.pdf
55-65% dichloromethane
12-20% phenol
12-20% formic acid
1-5% Hydrofluoric Acid
Paint stripper as mentioned in the kiwi video was 87% dichloromethane 13% methanol. It was diggers 4l from Bunnings https://www.bunnings.co.nz/diggers-pain ... _p01582659 @ 60 bucks.
The B17 dip approach is a nice one, that I could see myself using for several purposes.
Will see what I can find premixed, when I get some funds again.
Fred's FreeEMS Powered 89 Ford Courier w/ Holset fed FE-DOHC
Re: Fred's FreeEMS Powered 89 Ford Courier w/ Holset fed FE-
DIYEFI.org - where Open Source means Open Source, and Free means Freedom
FreeEMS.org - the open source engine management system
FreeEMS dev diary and its comments thread and my turbo truck!
n00bs, do NOT PM or email tech questions! Use the forum!
The ever growing list of FreeEMS success stories!
FreeEMS.org - the open source engine management system
FreeEMS dev diary and its comments thread and my turbo truck!
n00bs, do NOT PM or email tech questions! Use the forum!
The ever growing list of FreeEMS success stories!
Re: Fred's FreeEMS Powered 89 Ford Courier w/ Holset fed FE-
Found this one in a US government warning document about paint strippers: https://en.wikipedia.org/wiki/N-Methyl-2-pyrrolidone
This, too: https://en.wikipedia.org/wiki/Dibasic_ester "including dimethyl adipate ester, dimethyl succinate ester, and dimethyl glutarate ester"
The same document also specs acetone and toluene as common ingredients, along with the two in the above post.
http://www.cpsc.gov/Global/Safety%20Edu ... cation.pdf cached attached, click first, if 404, then grab attachment.
I'm starting to think just buying paint stripper is a good idea, except that if I want to build a bulk cold "hot tank" for stripping metal parts of all kinds of gunk, then I'll need a lot, and DIY will be the economical option. I'll also need to find a 200 litre drum with a removable lid to keep it sealed and accessible without pouring in and out into a tray like my ice trough.
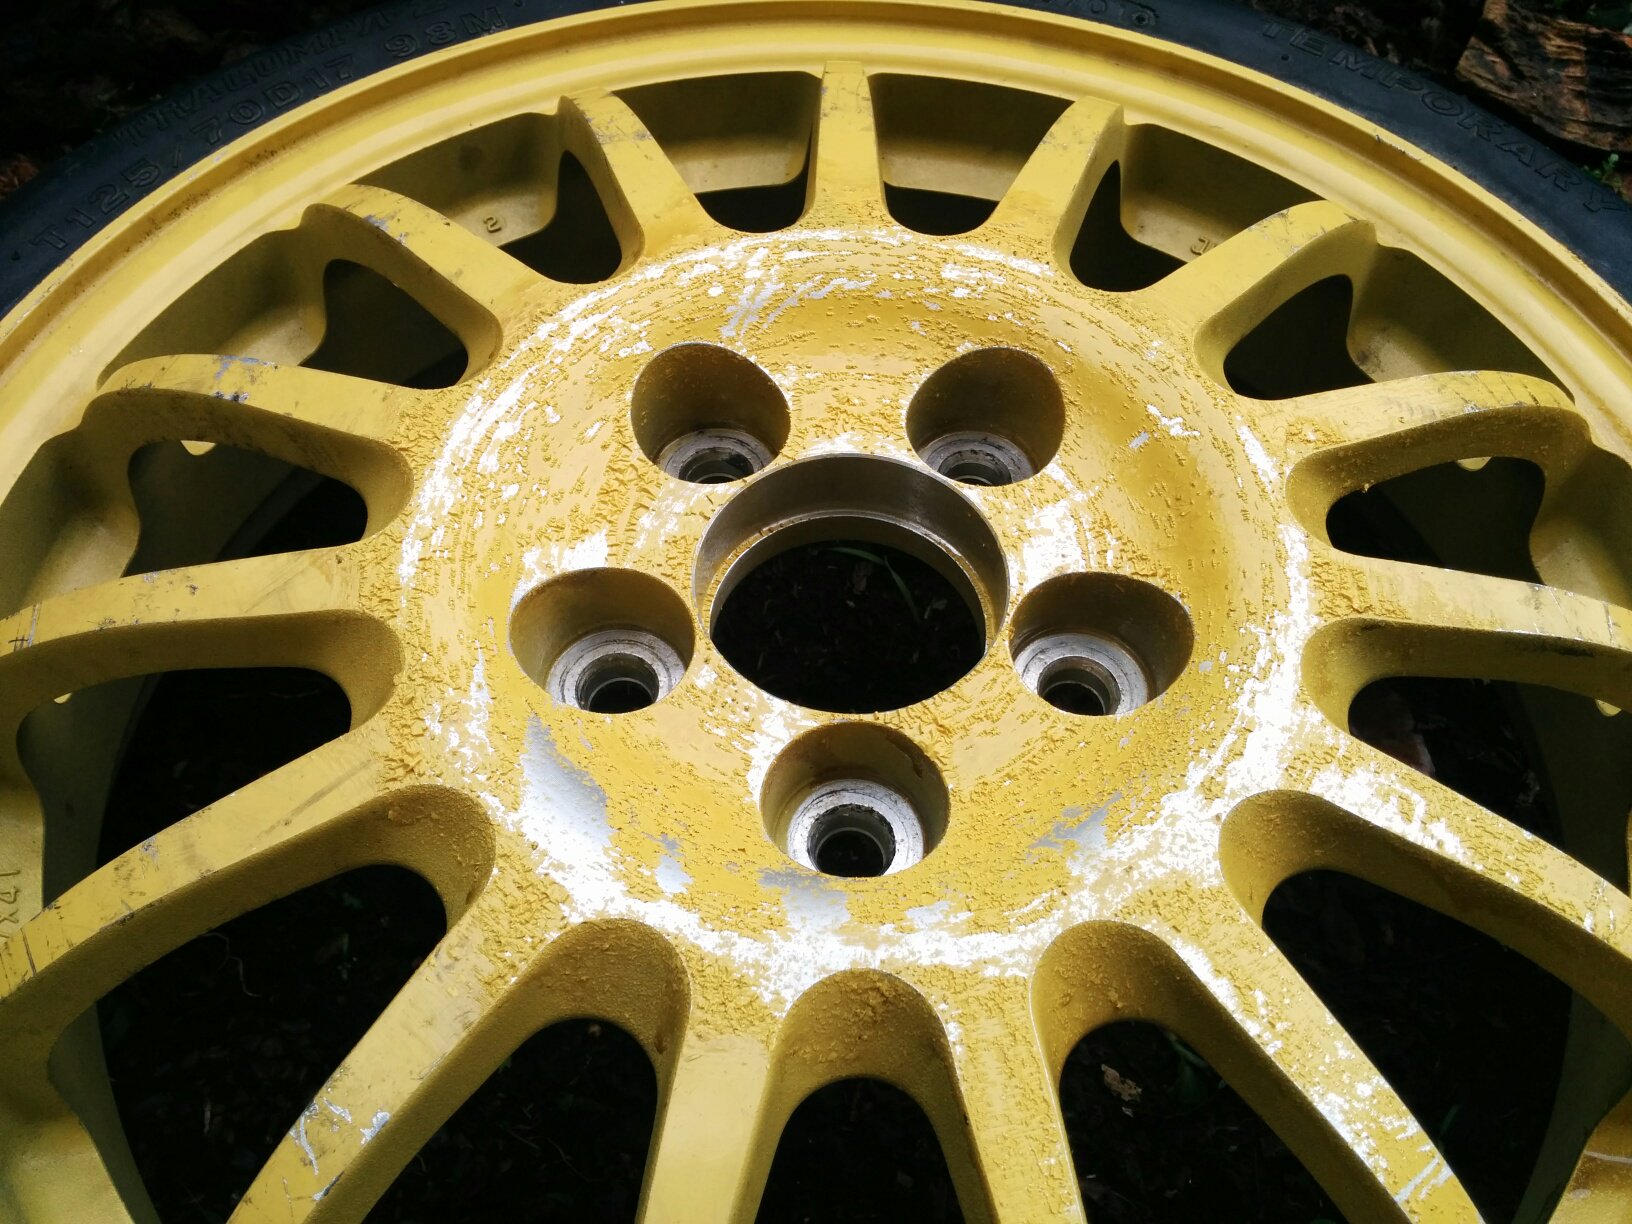
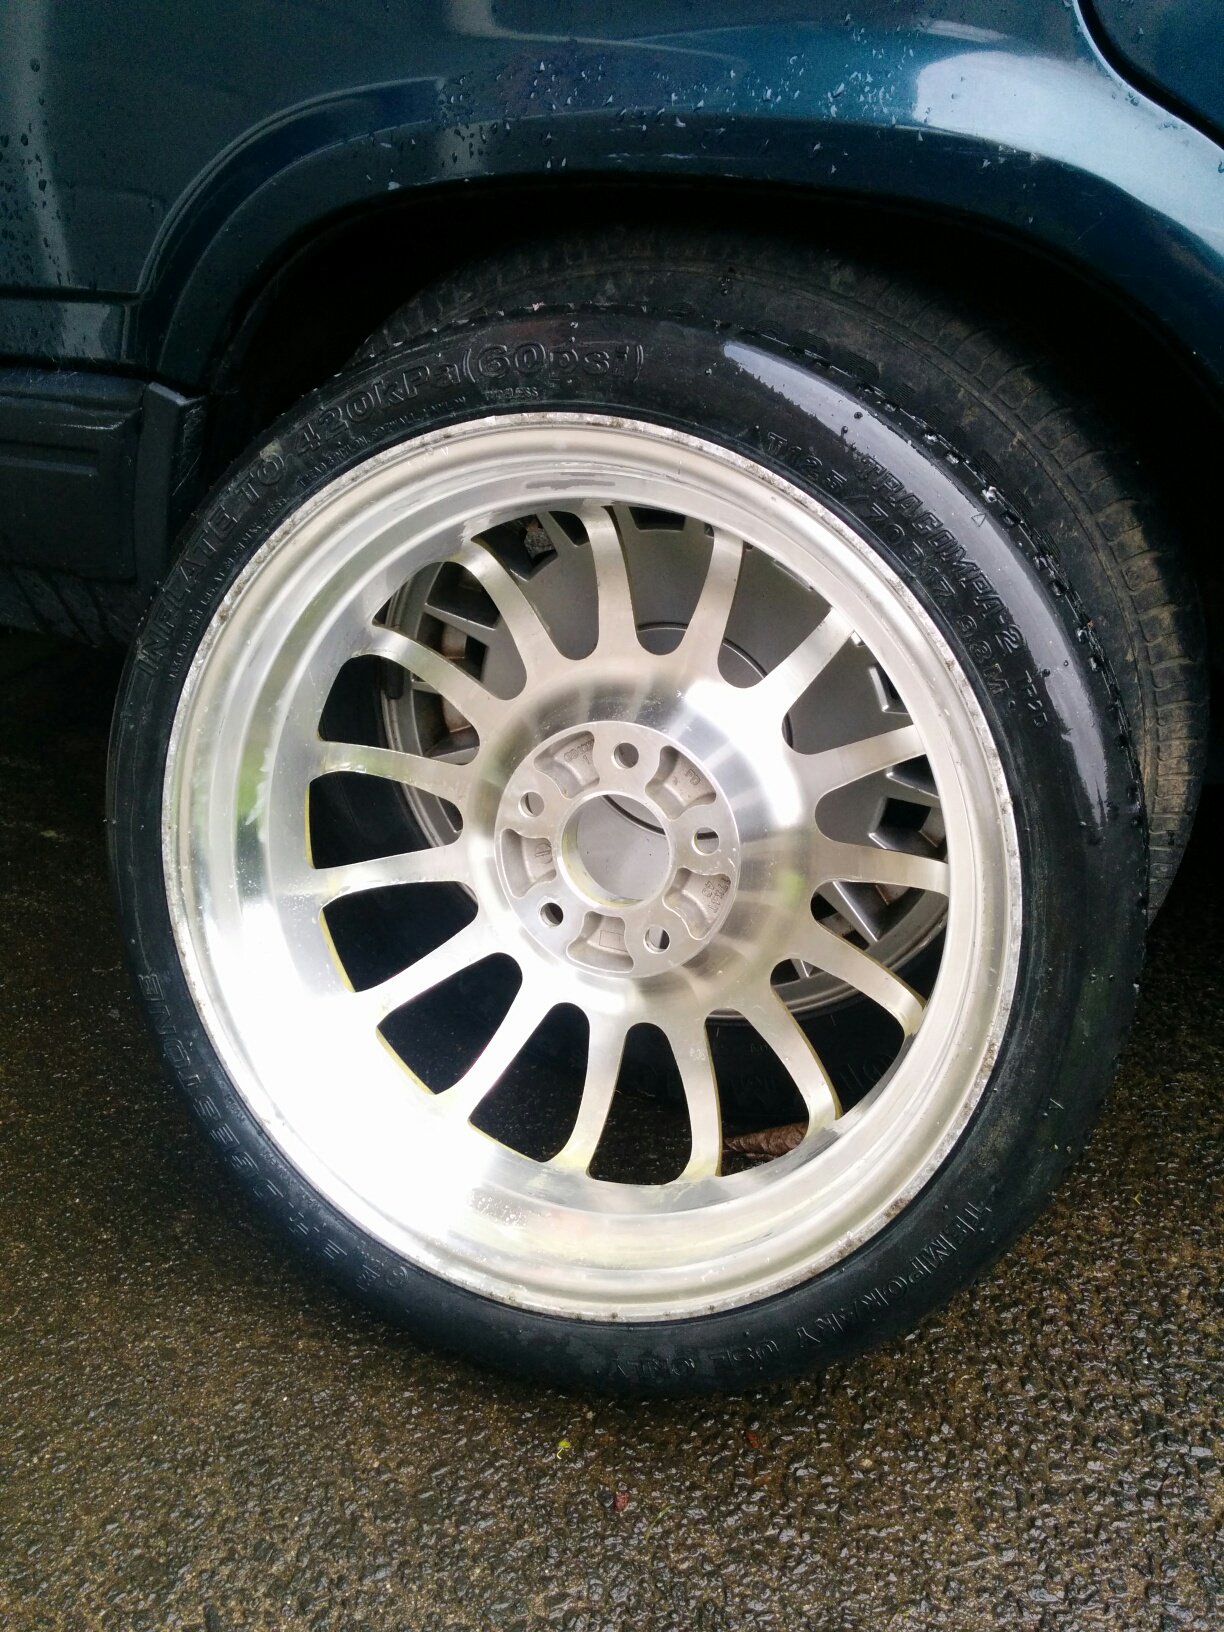
I had an ancient bottle of stripper from around 20 years ago down stairs, opened it up, and that familiar odour wofted up, which I can only assume is DCM as the label is long gone. Took it outside (still managed to breath a little bit, yuck... you KNOW you've done this, and can quickly breath out and breath in some fresher air) and applied it to the space saver in the hopes of turning it into a front runner for good. Still worked fine, despite the 20 years, but had some chunky hard plastic crystals in the mix that didn't seem to matter. Pics:

Same pics in tweets:
Stripper stripping https://twitter.com/FredCookeNZ/status/ ... 4137780224 disappointed? :-D
Getting there: https://twitter.com/FredCookeNZ/status/ ... 3870011392
Bare back side: https://twitter.com/FredCookeNZ/status/ ... 2791276544
Bare front, still some in the pits: https://twitter.com/FredCookeNZ/status/ ... 4507637761
:-p
This genuine factory sized brembo brake rotor has only done minimum miles (5000 km or so?) of which the last piece was Hampton Downs. The colour is indicative of that usage :-D https://twitter.com/FredCookeNZ/status/ ... 3566627840
If I get bored, I'll have a play with the remaining bits on the sides and try to get it all clean and pretty. There'll likely be more inside the tyre, I guess, but I'm not sure how much I care about that.
This, too: https://en.wikipedia.org/wiki/Dibasic_ester "including dimethyl adipate ester, dimethyl succinate ester, and dimethyl glutarate ester"
The same document also specs acetone and toluene as common ingredients, along with the two in the above post.
http://www.cpsc.gov/Global/Safety%20Edu ... cation.pdf cached attached, click first, if 404, then grab attachment.
I'm starting to think just buying paint stripper is a good idea, except that if I want to build a bulk cold "hot tank" for stripping metal parts of all kinds of gunk, then I'll need a lot, and DIY will be the economical option. I'll also need to find a 200 litre drum with a removable lid to keep it sealed and accessible without pouring in and out into a tray like my ice trough.
I had an ancient bottle of stripper from around 20 years ago down stairs, opened it up, and that familiar odour wofted up, which I can only assume is DCM as the label is long gone. Took it outside (still managed to breath a little bit, yuck... you KNOW you've done this, and can quickly breath out and breath in some fresher air) and applied it to the space saver in the hopes of turning it into a front runner for good. Still worked fine, despite the 20 years, but had some chunky hard plastic crystals in the mix that didn't seem to matter. Pics:
Same pics in tweets:
Stripper stripping https://twitter.com/FredCookeNZ/status/ ... 4137780224 disappointed? :-D
Getting there: https://twitter.com/FredCookeNZ/status/ ... 3870011392
Bare back side: https://twitter.com/FredCookeNZ/status/ ... 2791276544
Bare front, still some in the pits: https://twitter.com/FredCookeNZ/status/ ... 4507637761
:-p
This genuine factory sized brembo brake rotor has only done minimum miles (5000 km or so?) of which the last piece was Hampton Downs. The colour is indicative of that usage :-D https://twitter.com/FredCookeNZ/status/ ... 3566627840
If I get bored, I'll have a play with the remaining bits on the sides and try to get it all clean and pretty. There'll likely be more inside the tyre, I guess, but I'm not sure how much I care about that.
- Attachments
-
- 423 Paint Stripper Publication.pdf
- (70.08 KiB) Downloaded 763 times
DIYEFI.org - where Open Source means Open Source, and Free means Freedom
FreeEMS.org - the open source engine management system
FreeEMS dev diary and its comments thread and my turbo truck!
n00bs, do NOT PM or email tech questions! Use the forum!
The ever growing list of FreeEMS success stories!
FreeEMS.org - the open source engine management system
FreeEMS dev diary and its comments thread and my turbo truck!
n00bs, do NOT PM or email tech questions! Use the forum!
The ever growing list of FreeEMS success stories!
Re: Fred's FreeEMS Powered 89 Ford Courier w/ Holset fed FE-
http://www.rhdjapan.com/feed-large-capa ... -fd3s.html
Would love to get or make something like this at some point. Two other designs exist, but I prefer this one.
EDIT: Inlined as many cached photos as I could, also known as Nagisa Auto product.


Would love to get or make something like this at some point. Two other designs exist, but I prefer this one.
EDIT: Inlined as many cached photos as I could, also known as Nagisa Auto product.
DIYEFI.org - where Open Source means Open Source, and Free means Freedom
FreeEMS.org - the open source engine management system
FreeEMS dev diary and its comments thread and my turbo truck!
n00bs, do NOT PM or email tech questions! Use the forum!
The ever growing list of FreeEMS success stories!
FreeEMS.org - the open source engine management system
FreeEMS dev diary and its comments thread and my turbo truck!
n00bs, do NOT PM or email tech questions! Use the forum!
The ever growing list of FreeEMS success stories!
Re: Fred's FreeEMS Powered 89 Ford Courier w/ Holset fed FE-
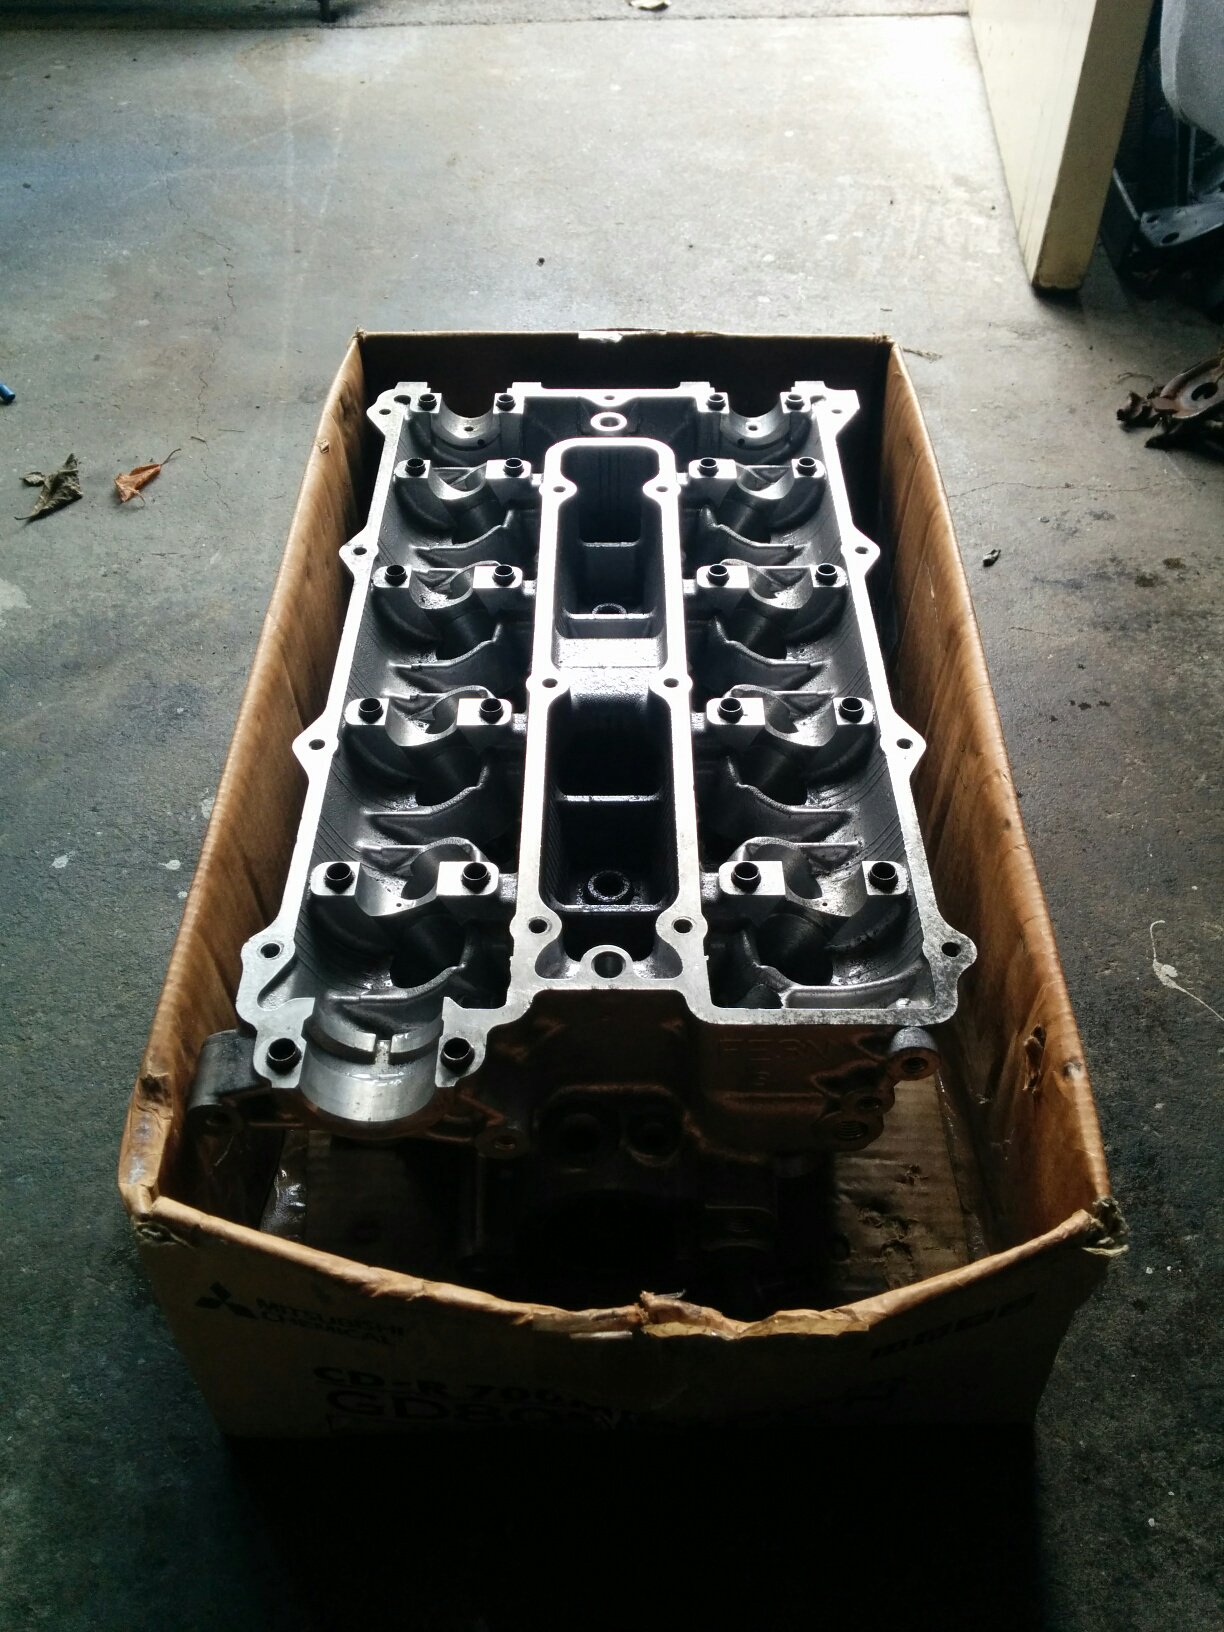
Went down into the garage and spent 45 minutes measuring and thinking and looking and so forth.
Pulled out my spare heads to play with: https://twitter.com/FredCookeNZ/status/ ... 3885884416
Front outside with dimensions: https://twitter.com/FredCookeNZ/status/ ... 6326819841
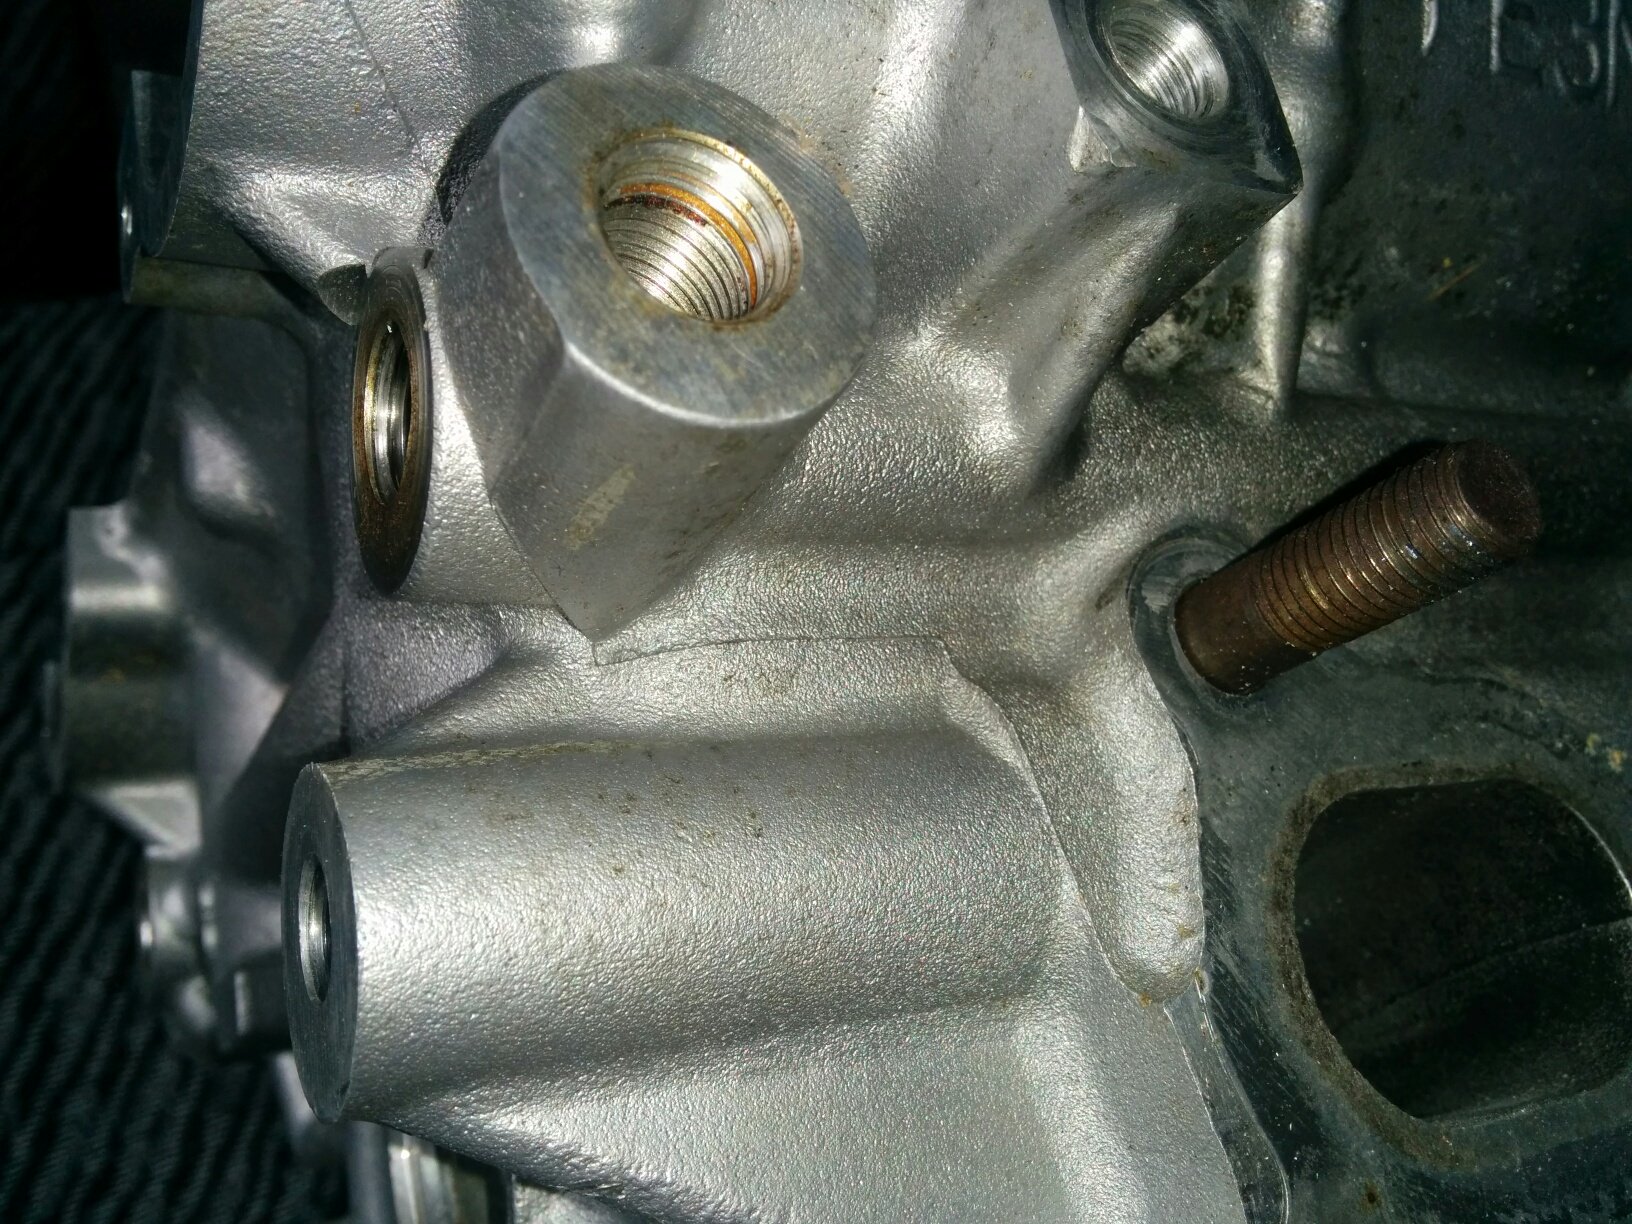
Front inside with game plan: https://twitter.com/FredCookeNZ/status/ ... 7283801088
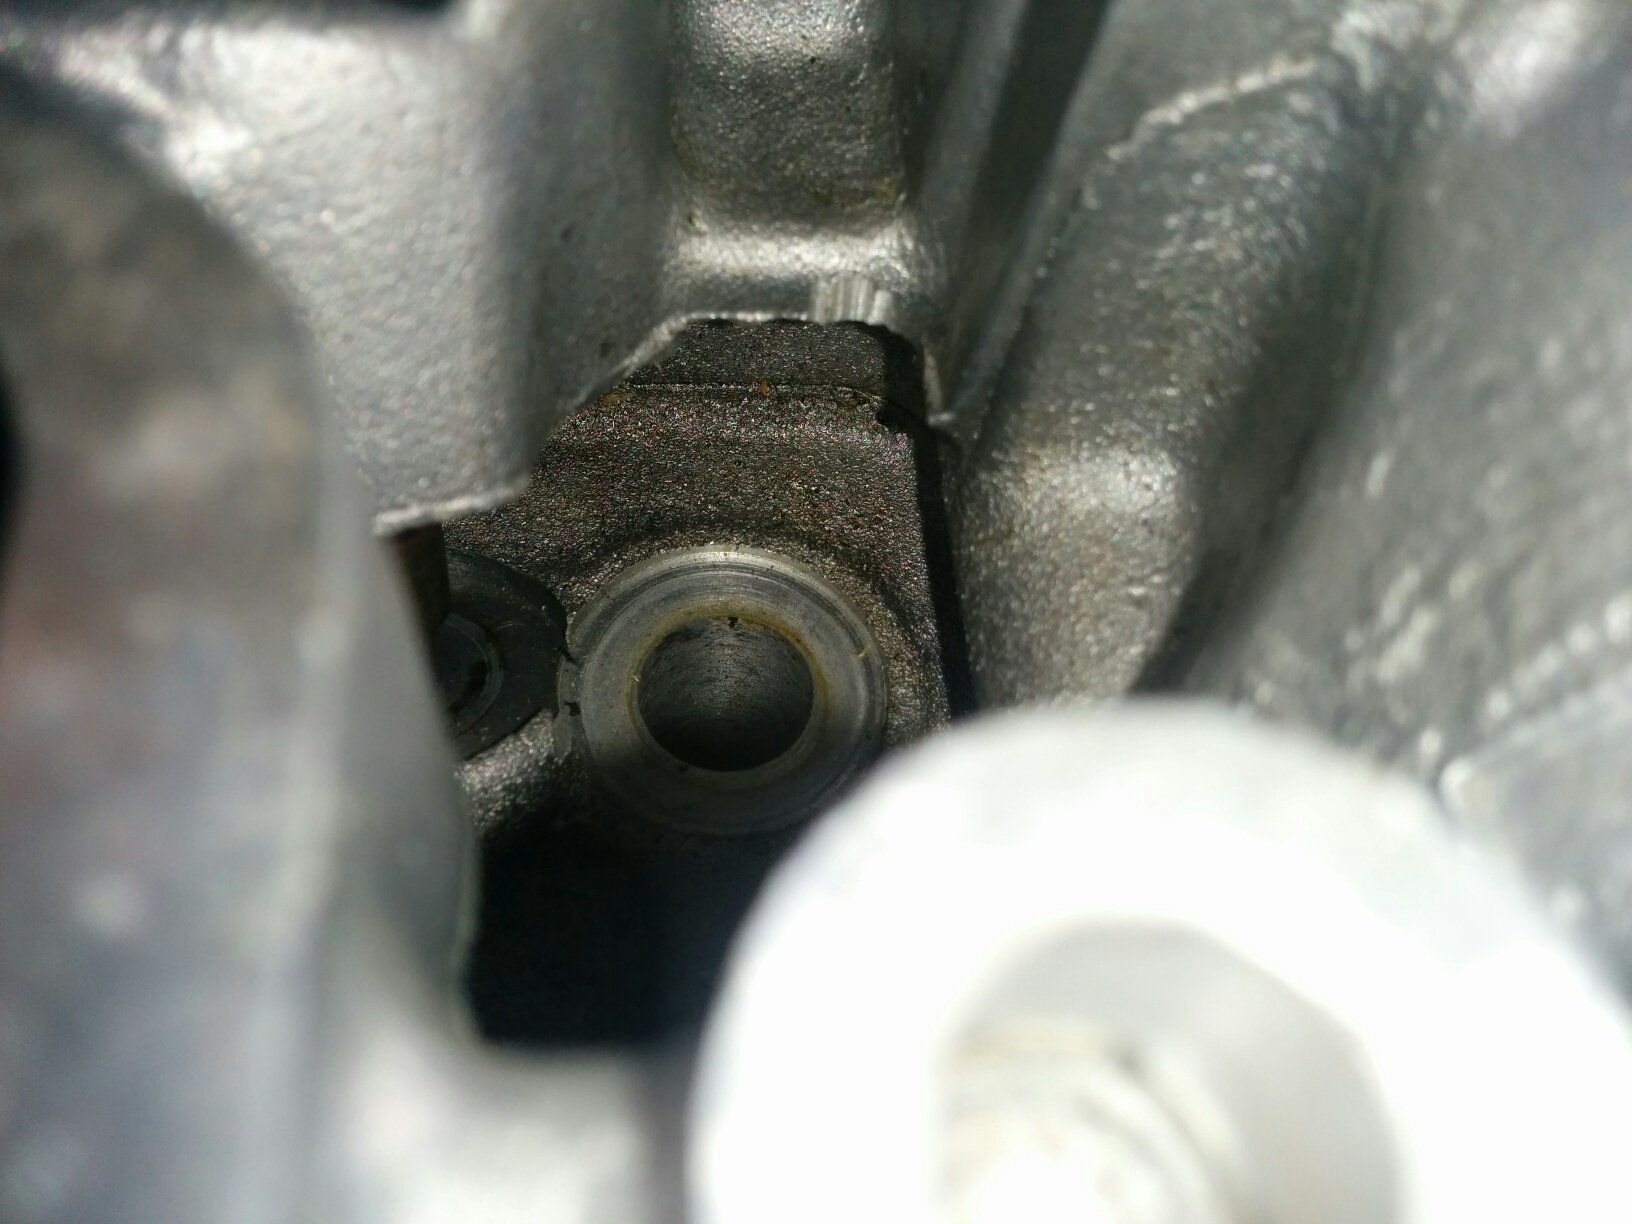
Rear outside with plan: https://twitter.com/FredCookeNZ/status/ ... 1121514496
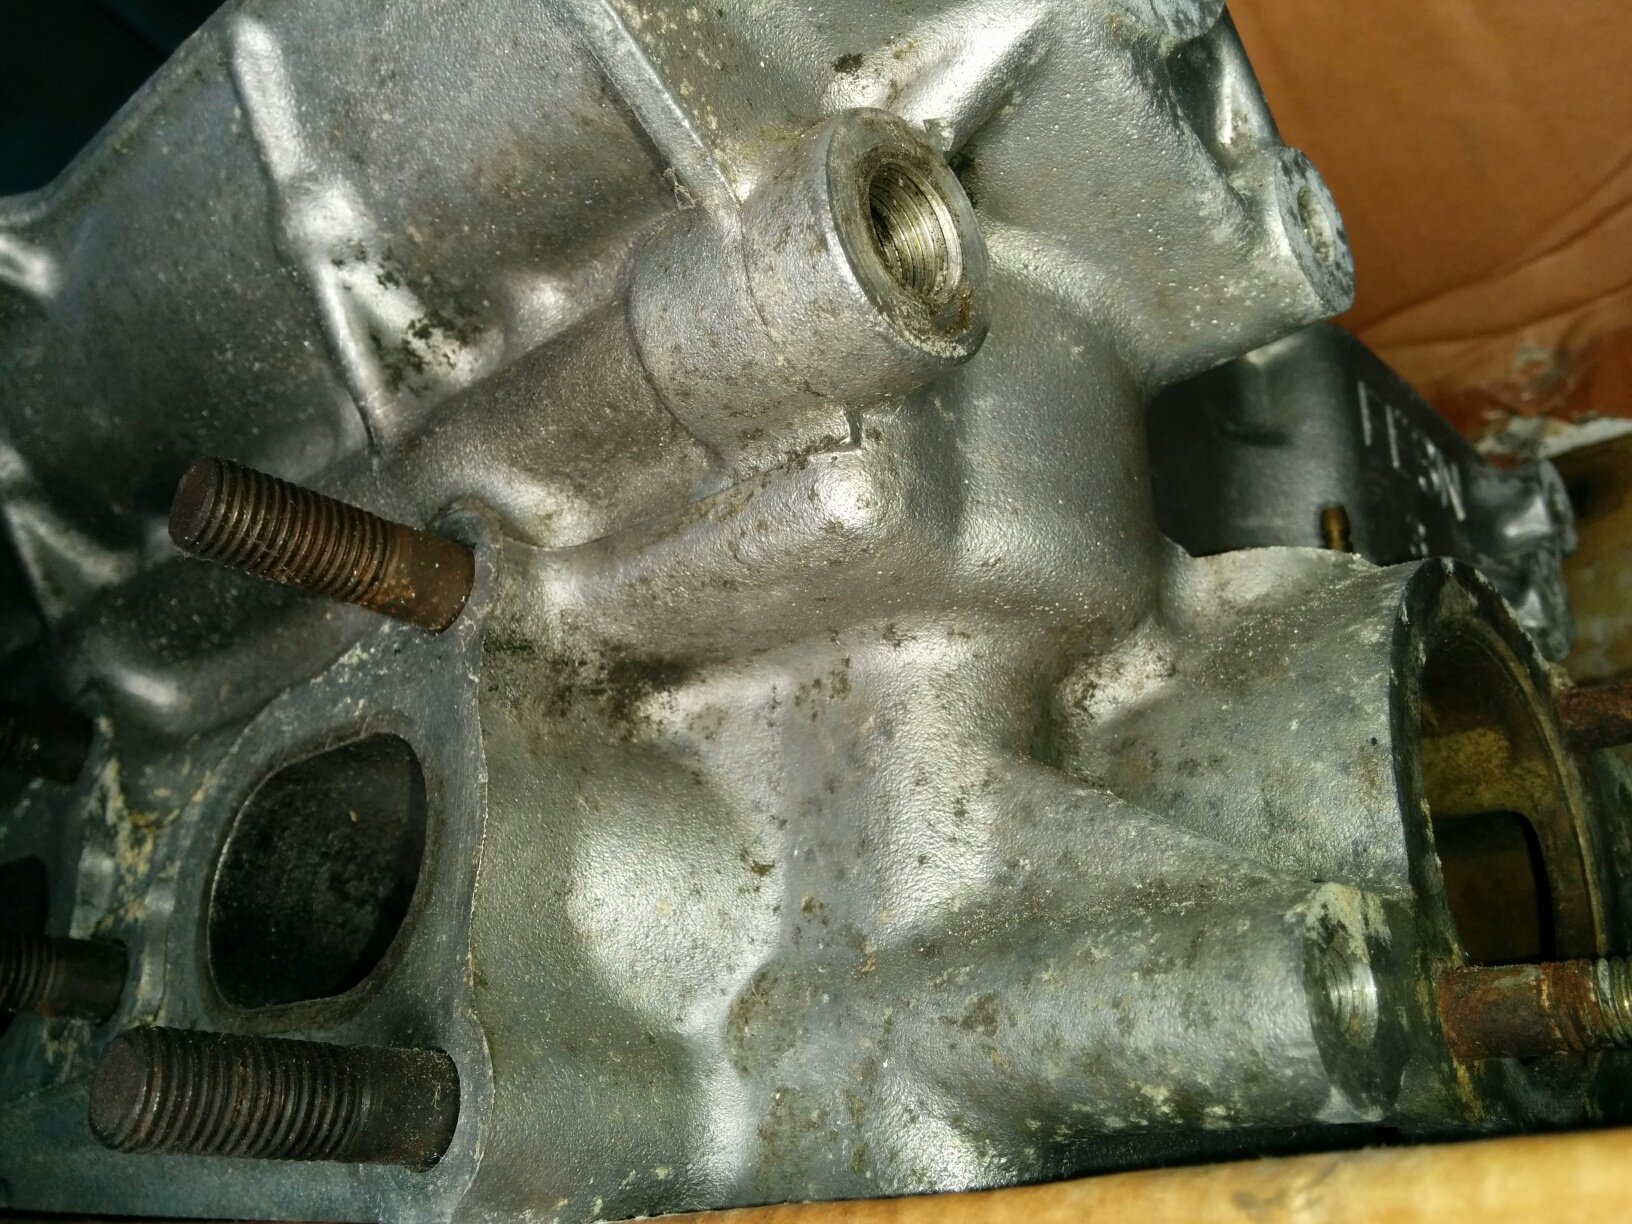
And then spent 15 minutes updating the previous post with pics, and 30 minutes writing this post and editing these pics with crudely drawn information:


Key:
Red = preferred location
Black = possible location
Green = avoid this
Yellow = hot, maximise distance
Completing this requires other people's help for TIG welding fittings/tube onto the head, and it needs to be rugged/strong to make me happy. I'll probably use thick walled tube or solid stock drilled or machined out and contoured to match with threads cut into it to screw a barb fitting into or maybe an old large aircon alloy line down to the sump, the rear one will need to be very heat resistant, and so will the top of the front one. Front one should come out 45 degrees down and perpendicular to the front plane. Rear one possibly similar, but need to measure/think more first.
Fred.
Pulled out my spare heads to play with: https://twitter.com/FredCookeNZ/status/ ... 3885884416
Front outside with dimensions: https://twitter.com/FredCookeNZ/status/ ... 6326819841
Front inside with game plan: https://twitter.com/FredCookeNZ/status/ ... 7283801088
Rear outside with plan: https://twitter.com/FredCookeNZ/status/ ... 1121514496
And then spent 15 minutes updating the previous post with pics, and 30 minutes writing this post and editing these pics with crudely drawn information:
Key:
Red = preferred location
Black = possible location
Green = avoid this
Yellow = hot, maximise distance
Completing this requires other people's help for TIG welding fittings/tube onto the head, and it needs to be rugged/strong to make me happy. I'll probably use thick walled tube or solid stock drilled or machined out and contoured to match with threads cut into it to screw a barb fitting into or maybe an old large aircon alloy line down to the sump, the rear one will need to be very heat resistant, and so will the top of the front one. Front one should come out 45 degrees down and perpendicular to the front plane. Rear one possibly similar, but need to measure/think more first.
Fred.
DIYEFI.org - where Open Source means Open Source, and Free means Freedom
FreeEMS.org - the open source engine management system
FreeEMS dev diary and its comments thread and my turbo truck!
n00bs, do NOT PM or email tech questions! Use the forum!
The ever growing list of FreeEMS success stories!
FreeEMS.org - the open source engine management system
FreeEMS dev diary and its comments thread and my turbo truck!
n00bs, do NOT PM or email tech questions! Use the forum!
The ever growing list of FreeEMS success stories!
Re: Fred's FreeEMS Powered 89 Ford Courier w/ Holset fed FE-
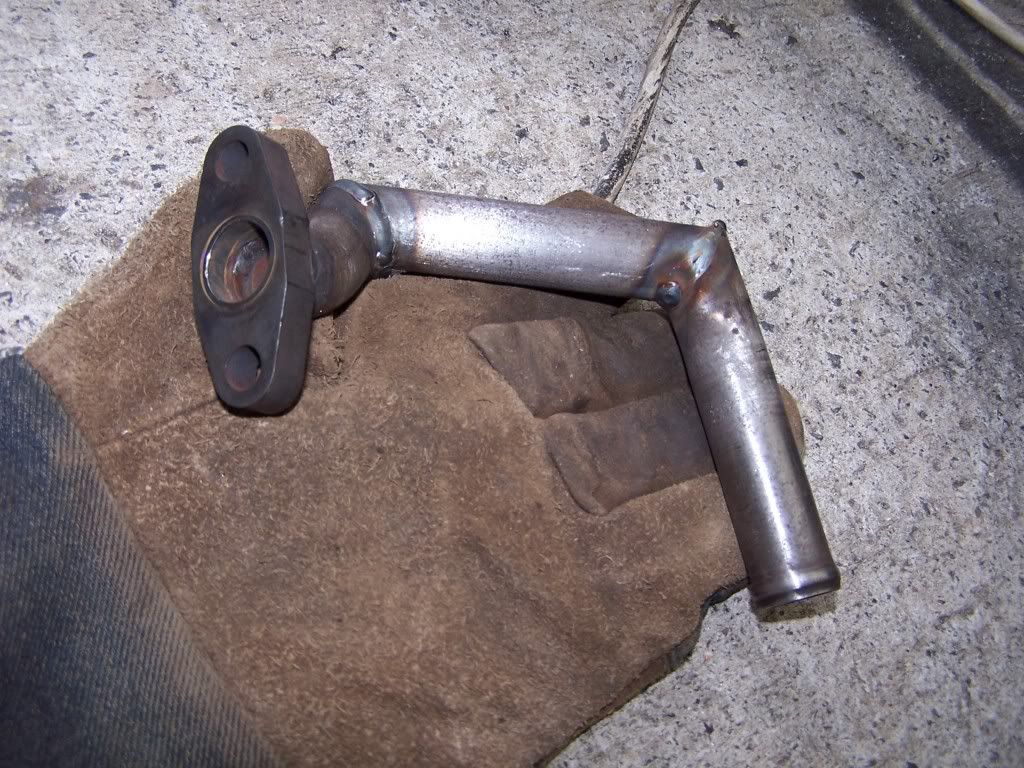
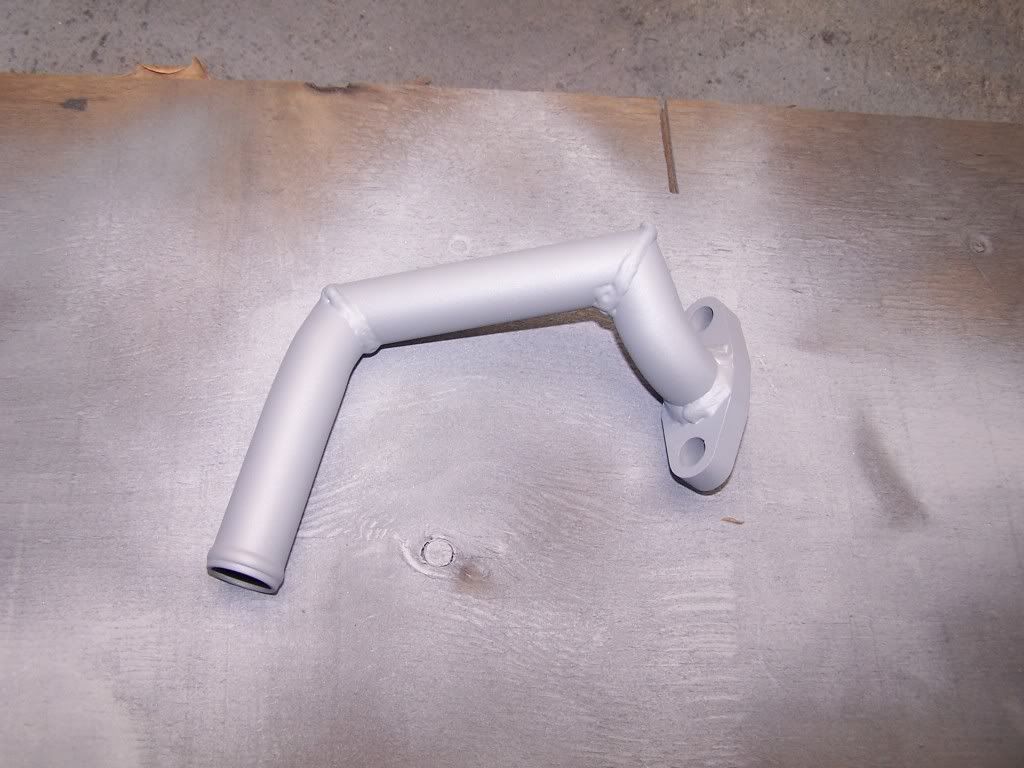
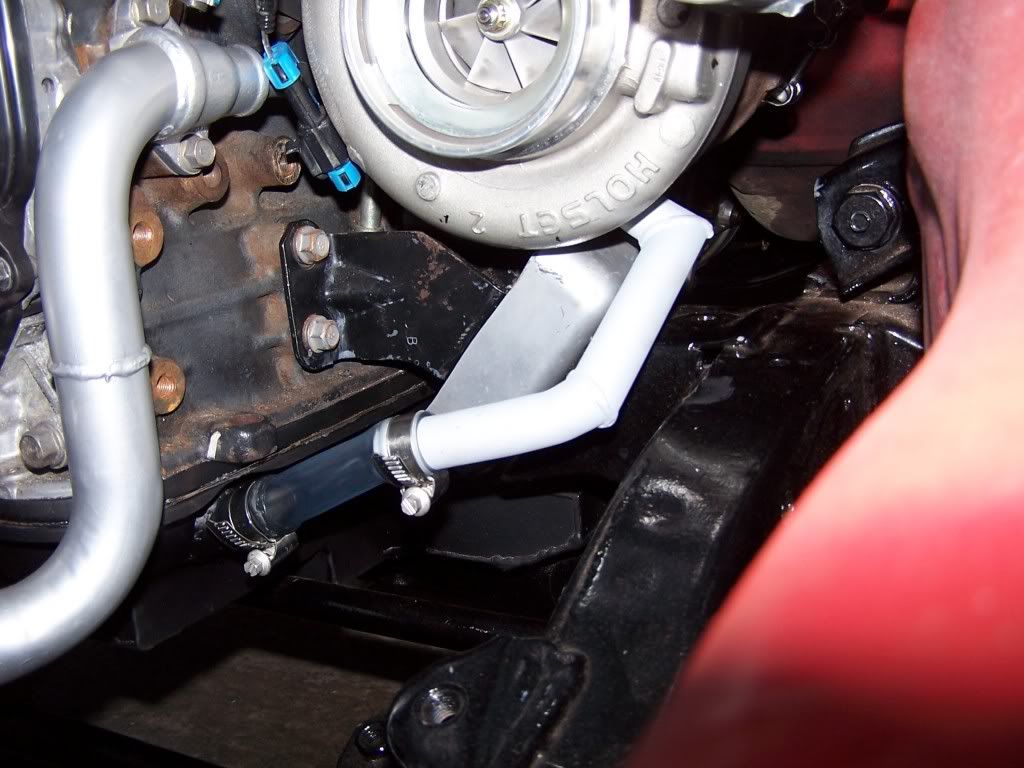
This convoluted thing is my oil return to the sump from the holset. It's a stock one modified to get around my engine mount, and it flows OK despite the shape. I measured it earlier but forgot to include in the previous post. The OD is 22mm, which is some imperial size, maybe 7/8" or so? It'd be nice if the new head drains mached this. Then I could T the front one into the top of the turbo return and only need one new fitting near the rear of the sump for the other one.

DIYEFI.org - where Open Source means Open Source, and Free means Freedom
FreeEMS.org - the open source engine management system
FreeEMS dev diary and its comments thread and my turbo truck!
n00bs, do NOT PM or email tech questions! Use the forum!
The ever growing list of FreeEMS success stories!
FreeEMS.org - the open source engine management system
FreeEMS dev diary and its comments thread and my turbo truck!
n00bs, do NOT PM or email tech questions! Use the forum!
The ever growing list of FreeEMS success stories!
Re: Fred's FreeEMS Powered 89 Ford Courier w/ Holset fed FE-
Ute pads post track day abuse:
https://twitter.com/FredCookeNZ/status/ ... 4012546048 and
https://twitter.com/FredCookeNZ/status/ ... 7785482240 and
https://twitter.com/FredCookeNZ/status/ ... 5376326657
Inlined:

Did a bit of measuring on the brake situation just now...
FD caliper details: https://twitter.com/FredCookeNZ/status/ ... 9779478529
Ute caliper details + FD pad centre to rotor edge distance: https://twitter.com/FredCookeNZ/status/ ... 3196518400
Missing details are:
49mm single piston, slide caliper
34mm + 28mm 4 piston, fixed caliper
The fact that there's four pistons is irrelevant, what we're looking for is volume of fluid to compress a certain amount, so relative piston area for the plane it's all acting on, with the large one moving twice as far as half the small ones, or the same distance as the set.
Pi * R^2
3.14159 * 24.5 * 24.5 = 1885.74mm^2 factory
3.14159 * 14.0 * 14.0 = 615.75mm^2
3.14159 * 17.0 * 17.0 = 907.92mm^2
615.75mm + 907.92 = 1523.67mm^2 new/improved
So my master cylinder will actually work fine, with a slightly ~20% stiffer pedal and much much more retard force for the pressure applied. A larger cylinder will stiffen up the pedal further, and bring the foot pressure to stopping force back down to a good level. Future mod, not too urgent. Though I have 2 or 3 larger master cylinders on the shelf already.
https://twitter.com/FredCookeNZ/status/ ... 4012546048 and
https://twitter.com/FredCookeNZ/status/ ... 7785482240 and
https://twitter.com/FredCookeNZ/status/ ... 5376326657
Inlined:
Did a bit of measuring on the brake situation just now...
FD caliper details: https://twitter.com/FredCookeNZ/status/ ... 9779478529
Ute caliper details + FD pad centre to rotor edge distance: https://twitter.com/FredCookeNZ/status/ ... 3196518400
Missing details are:
- M12 fasteners on the FD caliper vs M14 on the ute caliper
- Diagram of factory setup on ute vs what I'll have on mine
- Dimensions of the stock disk to calculate relative to
- Angle away from the horizontal that the stock caliper is mounted
- Desired rotor size to clear 16" wheels and still satisfy my needs
- Design the perfect adaptor plate in CAD
- Then make it in wood
- Then try it on the vehicle
- Then get it cut in steel or alloy
- Then get the holes tapped
- Then install the new calipers...
- With new rotors and the new hubs/bearings
49mm single piston, slide caliper
34mm + 28mm 4 piston, fixed caliper
The fact that there's four pistons is irrelevant, what we're looking for is volume of fluid to compress a certain amount, so relative piston area for the plane it's all acting on, with the large one moving twice as far as half the small ones, or the same distance as the set.
Pi * R^2
3.14159 * 24.5 * 24.5 = 1885.74mm^2 factory
3.14159 * 14.0 * 14.0 = 615.75mm^2
3.14159 * 17.0 * 17.0 = 907.92mm^2
615.75mm + 907.92 = 1523.67mm^2 new/improved
So my master cylinder will actually work fine, with a slightly ~20% stiffer pedal and much much more retard force for the pressure applied. A larger cylinder will stiffen up the pedal further, and bring the foot pressure to stopping force back down to a good level. Future mod, not too urgent. Though I have 2 or 3 larger master cylinders on the shelf already.
DIYEFI.org - where Open Source means Open Source, and Free means Freedom
FreeEMS.org - the open source engine management system
FreeEMS dev diary and its comments thread and my turbo truck!
n00bs, do NOT PM or email tech questions! Use the forum!
The ever growing list of FreeEMS success stories!
FreeEMS.org - the open source engine management system
FreeEMS dev diary and its comments thread and my turbo truck!
n00bs, do NOT PM or email tech questions! Use the forum!
The ever growing list of FreeEMS success stories!
Re: Fred's FreeEMS Powered 89 Ford Courier w/ Holset fed FE-
So the details pertinent to adaptor bracket design not mentioned above are:
ASCII art time:
Assuming bolt head = upright thickness = both caliper thicknesses, then...
Old:
New:
Key:
Stock rotor is 256x20
New rotor will be 314x32 +/- 24mm dia
So if I don't angle it around, the centre to centre distance from the caliper holes in the plate to the upright holes in the plate will be...
FD 65.0 from holes to centre of pad, 19.0 from centre of pad to edge of disk
Ute 55.5 from holes to centre of pad, 24.0 from centre of pad to edge of disk
Ute 256 rotor, 128 centre to edge, minus 79.5 edge of rotor to centre of mounting holes = 48.5mm
FD 314 rotor, 157 centre to edge, minus 84.0 edge of rotor to centre of mounting holes = 73.0mm
Difference is just 24.5mm for 314mm rotors
Or 17.5mm for 300mm rotors
Or 32.5mm for 330mm rotors
New measurements required...
Centre of hole to edge of upright, 15mm
Centre of hole to edge of caliper, 17mm
Sum of 32mm. Hmmm, I hope 330mm rotors fit under my 16" wheels! :-D However with the caliper correctly rotated down so as to be vertical the tabs will not line up, and some overlap would be OK. I'll need to get something designed and mocked up in wood before I know it can work, but I'm 99% sure it could work with a smaller rotor when rotated.
Now, what's the angle we need to rotate? Let me see...
12.5 degrees from the vertical. I also measured a horizontal offset of the two holes of 28-29mm. Which would make the long side of the right angle triangle 140mm, what was the memory trick? SOHCAHTOA? So 28-29/140 should equal the sin of 12.5 degrees. Well, 12.5 degrees gives 30.3mm offset, and 12.5 degrees was fairly imprecise, too. Doing it backward from 28.5 we get 11.75 degrees. So, around 12 degrees and 29mm match up. I'll have to draw it in CAD to see if it helps in using a smaller rotor. I'll also have to get hold of an FD 16x8" again and see what'll work.
A bit of good pad monologue here: http://www.fd3s.net/brakes.html#TRS
R4E Porterfield sounds quite attractive after reading that. Pad info: http://porterfield-brakes.com/images/po ... _41_04.pdf
He also talks about performance friction pads, which are listed here, the one he mentions is now obsolete, replaced with '97'. http://www.performancefriction.com/moto ... tions.aspx
I originally wanted to buy a set of Ferodo DS3000s or similar. Not sure how pricey those are, though.
The calipers have pads in them... so that is what it'll be running for a start, possibly. Unless I decide I don't want to corrupt brand new disks with unknown pads. We'll see.
Need to pull a pad out of the rear axle setup and see what shape they are. Handbrake and caliper are separate there, so I could swap to basically any caliper I could design an adaptor bracket for that has good off the shelf pad selection.
EDIT: I did: https://twitter.com/FredCookeNZ/status/ ... 5563509761
Probably not available in a performance compound to match the fronts so likely to be changed to something that does have those compounds available, and is preferably lighter, possibly 2 or 4 pot.
Subaru 2 pot, but the pads look tiny :-/ correct thickness for my van rotors, though.

Fred.
- Stock ute upright mounting hole thickness: 15mm steel
- FD3S RZ/RS caliper mounting hole thickness: 17mm alloy
- FD3S RZ/RS caliper distance to rotor slot: 17mm air :-p
ASCII art time:
Assuming bolt head = upright thickness = both caliper thicknesses, then...
Old:
Code: Select all
        CCCC
        CCCC
        CCCC
        CCCC
    UUUUCCCC
BBBBUUUUCCCC
BBBBBBBBBBBB
BBBBBBBBBBBB
BBBBUUUUCCCC
    UUUUCCCC
    UUUU
    UUUU
    UUUU
    UUUU
Code: Select all
    CCCC
    CCCC
    CCCC
    CCCC
    CCCCAAAA
BBBBCCCCAAAA
BBBBBBBBBBBB
BBBBBBBBBBBB
BBBBCCCCAAAA
    CCCCAAAA
        AAAA
        AAAA
        AAAA
        AAAA
    UUUUAAAA
BBBBUUUUAAAA
BBBBBBBBBBBB
BBBBBBBBBBBB
BBBBUUUUAAAA
    UUUUAAAA
    UUUU
    UUUU
    UUUU
    UUUU
- Bolt
- Caliper
- Adaptor
- Upright
Stock rotor is 256x20
New rotor will be 314x32 +/- 24mm dia
So if I don't angle it around, the centre to centre distance from the caliper holes in the plate to the upright holes in the plate will be...
FD 65.0 from holes to centre of pad, 19.0 from centre of pad to edge of disk
Ute 55.5 from holes to centre of pad, 24.0 from centre of pad to edge of disk
Ute 256 rotor, 128 centre to edge, minus 79.5 edge of rotor to centre of mounting holes = 48.5mm
FD 314 rotor, 157 centre to edge, minus 84.0 edge of rotor to centre of mounting holes = 73.0mm
Difference is just 24.5mm for 314mm rotors
Or 17.5mm for 300mm rotors
Or 32.5mm for 330mm rotors
New measurements required...
Centre of hole to edge of upright, 15mm
Centre of hole to edge of caliper, 17mm
Sum of 32mm. Hmmm, I hope 330mm rotors fit under my 16" wheels! :-D However with the caliper correctly rotated down so as to be vertical the tabs will not line up, and some overlap would be OK. I'll need to get something designed and mocked up in wood before I know it can work, but I'm 99% sure it could work with a smaller rotor when rotated.
Now, what's the angle we need to rotate? Let me see...
12.5 degrees from the vertical. I also measured a horizontal offset of the two holes of 28-29mm. Which would make the long side of the right angle triangle 140mm, what was the memory trick? SOHCAHTOA? So 28-29/140 should equal the sin of 12.5 degrees. Well, 12.5 degrees gives 30.3mm offset, and 12.5 degrees was fairly imprecise, too. Doing it backward from 28.5 we get 11.75 degrees. So, around 12 degrees and 29mm match up. I'll have to draw it in CAD to see if it helps in using a smaller rotor. I'll also have to get hold of an FD 16x8" again and see what'll work.
A bit of good pad monologue here: http://www.fd3s.net/brakes.html#TRS
R4E Porterfield sounds quite attractive after reading that. Pad info: http://porterfield-brakes.com/images/po ... _41_04.pdf
He also talks about performance friction pads, which are listed here, the one he mentions is now obsolete, replaced with '97'. http://www.performancefriction.com/moto ... tions.aspx
I originally wanted to buy a set of Ferodo DS3000s or similar. Not sure how pricey those are, though.
The calipers have pads in them... so that is what it'll be running for a start, possibly. Unless I decide I don't want to corrupt brand new disks with unknown pads. We'll see.
Need to pull a pad out of the rear axle setup and see what shape they are. Handbrake and caliper are separate there, so I could swap to basically any caliper I could design an adaptor bracket for that has good off the shelf pad selection.
EDIT: I did: https://twitter.com/FredCookeNZ/status/ ... 5563509761
Probably not available in a performance compound to match the fronts so likely to be changed to something that does have those compounds available, and is preferably lighter, possibly 2 or 4 pot.
Subaru 2 pot, but the pads look tiny :-/ correct thickness for my van rotors, though.
Fred.
DIYEFI.org - where Open Source means Open Source, and Free means Freedom
FreeEMS.org - the open source engine management system
FreeEMS dev diary and its comments thread and my turbo truck!
n00bs, do NOT PM or email tech questions! Use the forum!
The ever growing list of FreeEMS success stories!
FreeEMS.org - the open source engine management system
FreeEMS dev diary and its comments thread and my turbo truck!
n00bs, do NOT PM or email tech questions! Use the forum!
The ever growing list of FreeEMS success stories!
Re: Fred's FreeEMS Powered 89 Ford Courier w/ Holset fed FE-
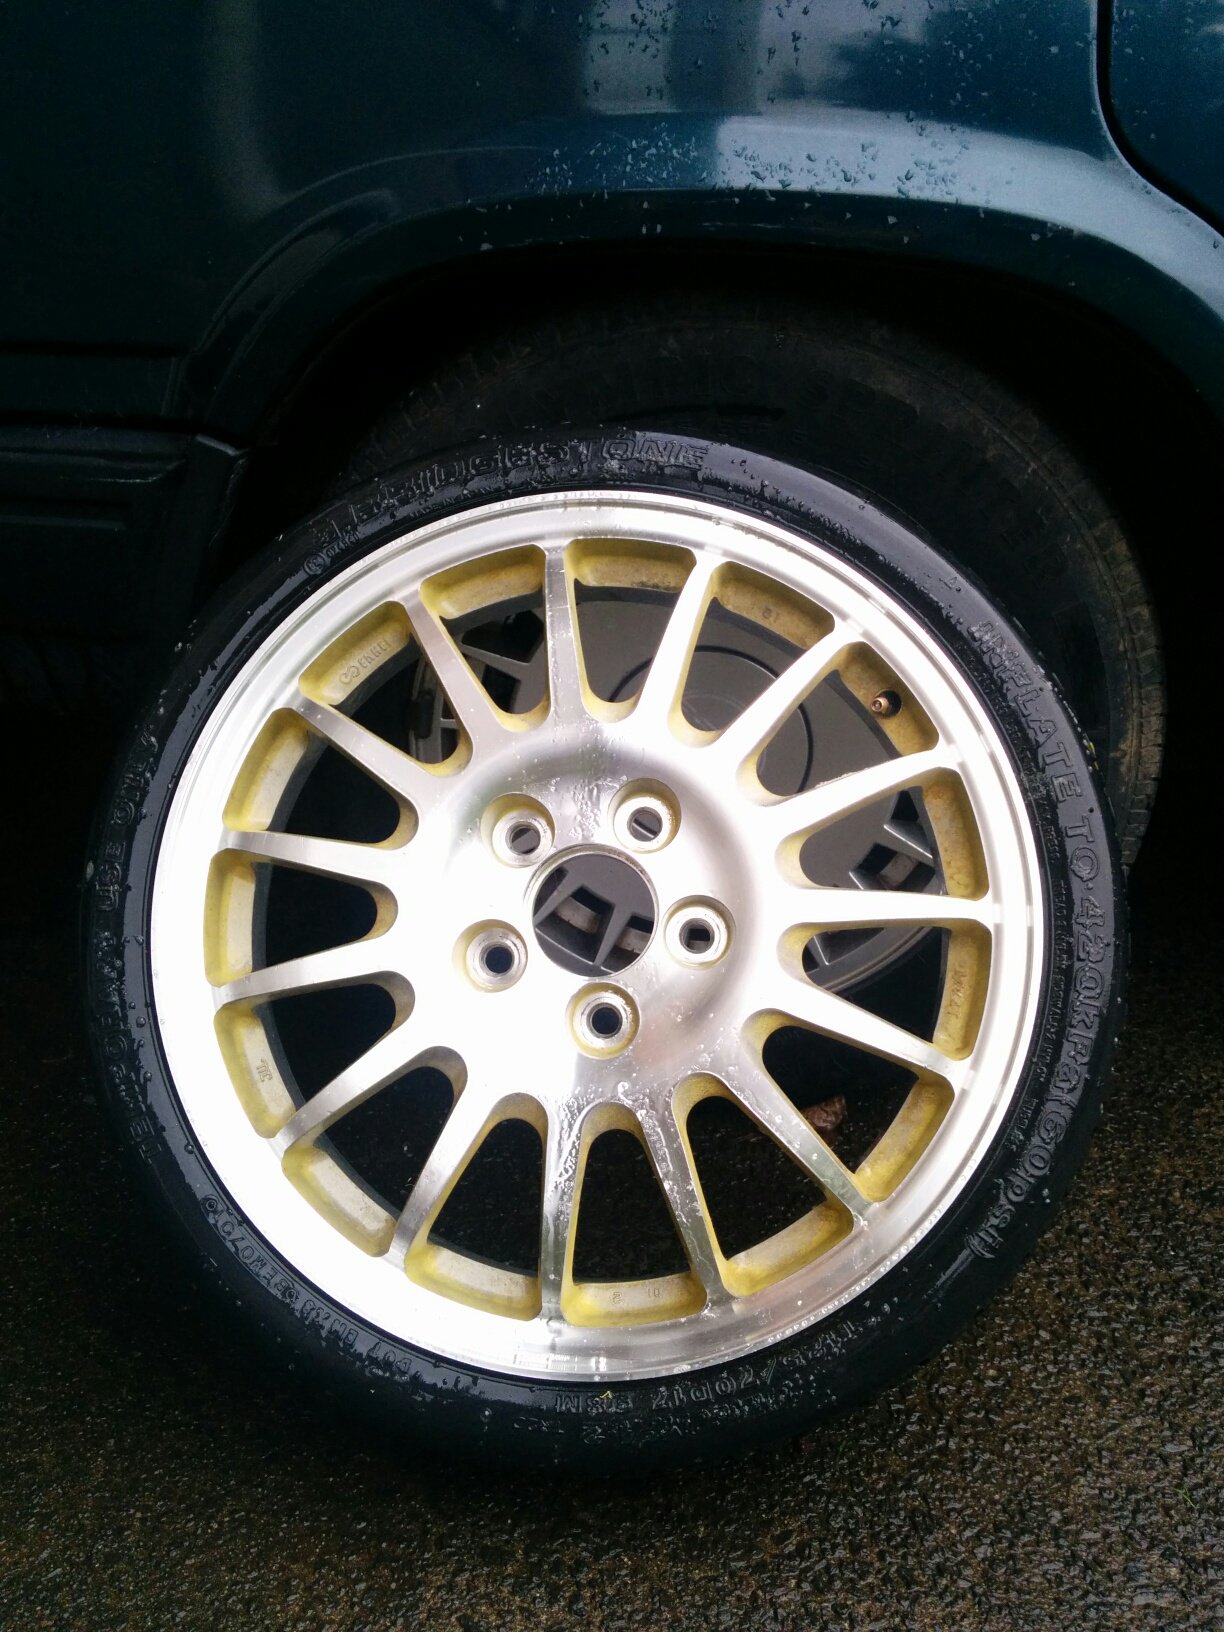
Played around with the wheel stripping a little more tonight:
Before centre field, after background/left: https://twitter.com/FredCookeNZ/status/ ... 7753469952
After centre field, before everywhere else: https://twitter.com/FredCookeNZ/status/ ... 5407862784
Border between scrubbed/not: https://twitter.com/FredCookeNZ/status/ ... 2911555584
Enkei logo cleaned up: https://twitter.com/FredCookeNZ/status/ ... 8047315968
Inlined:
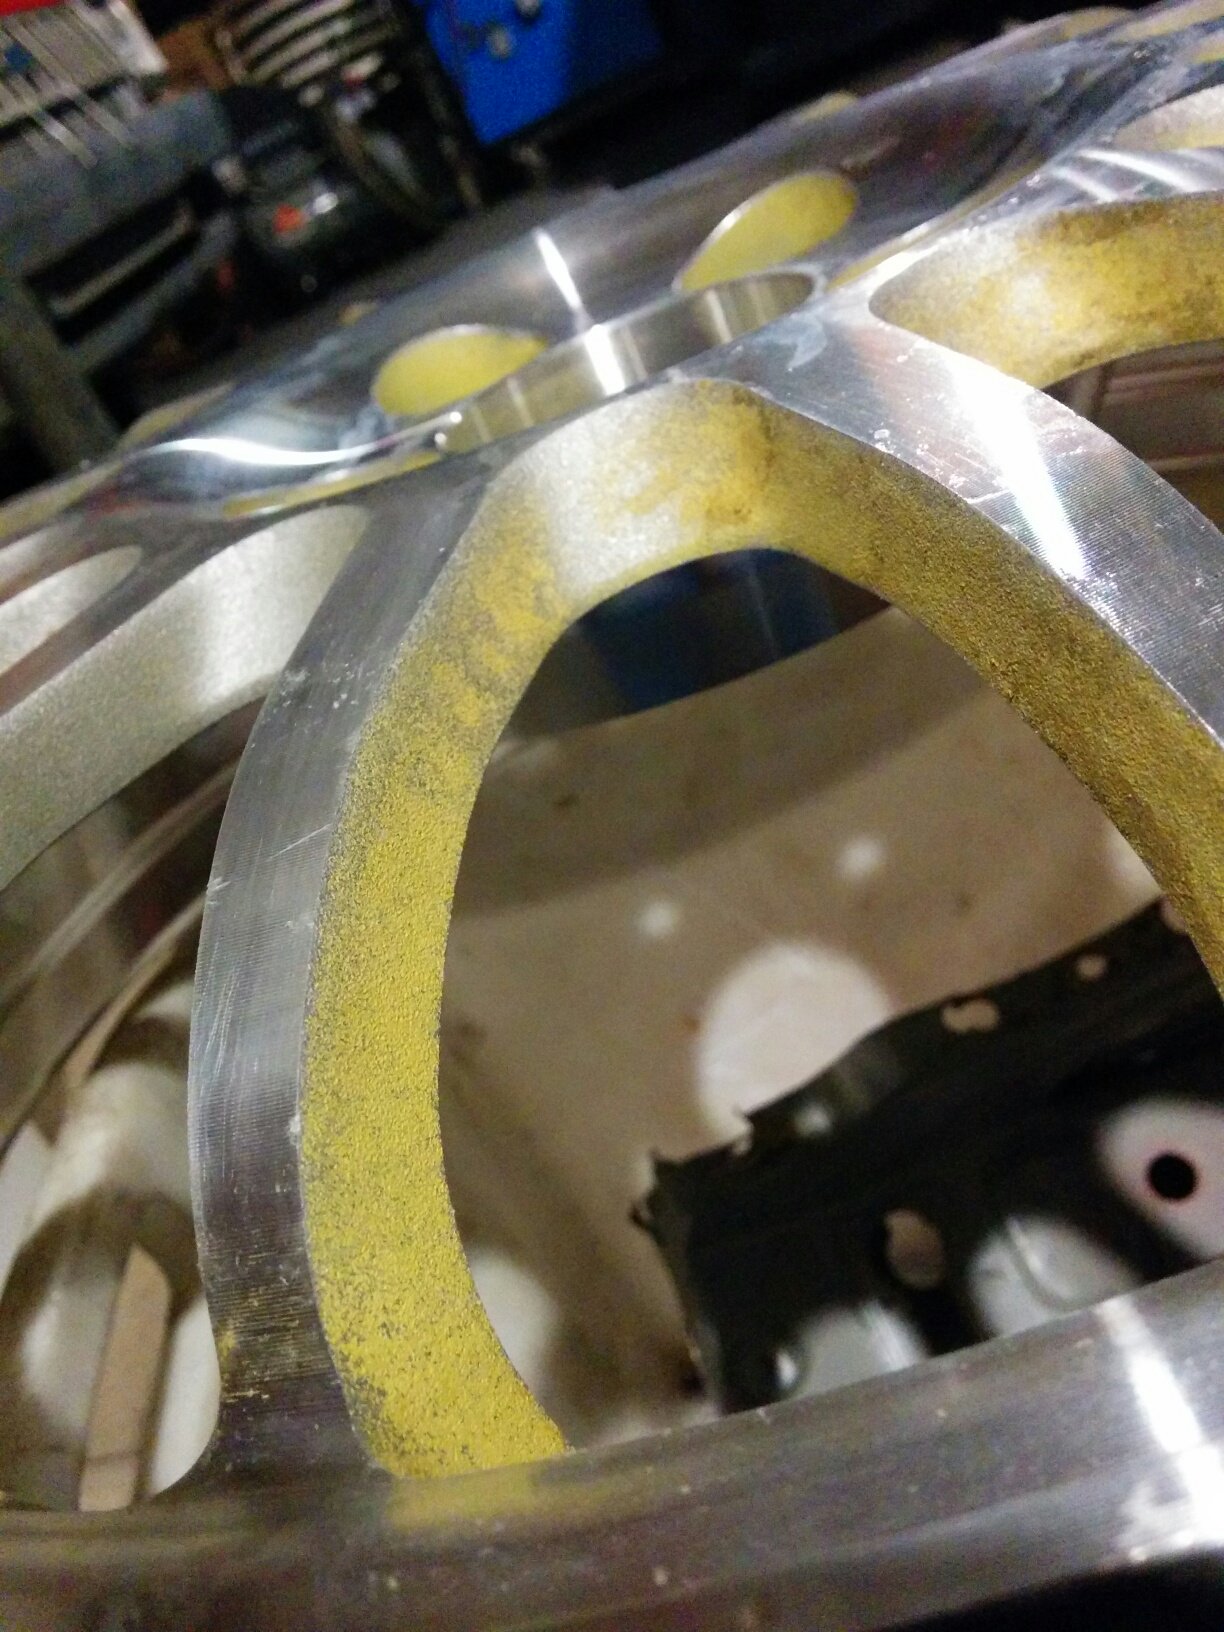
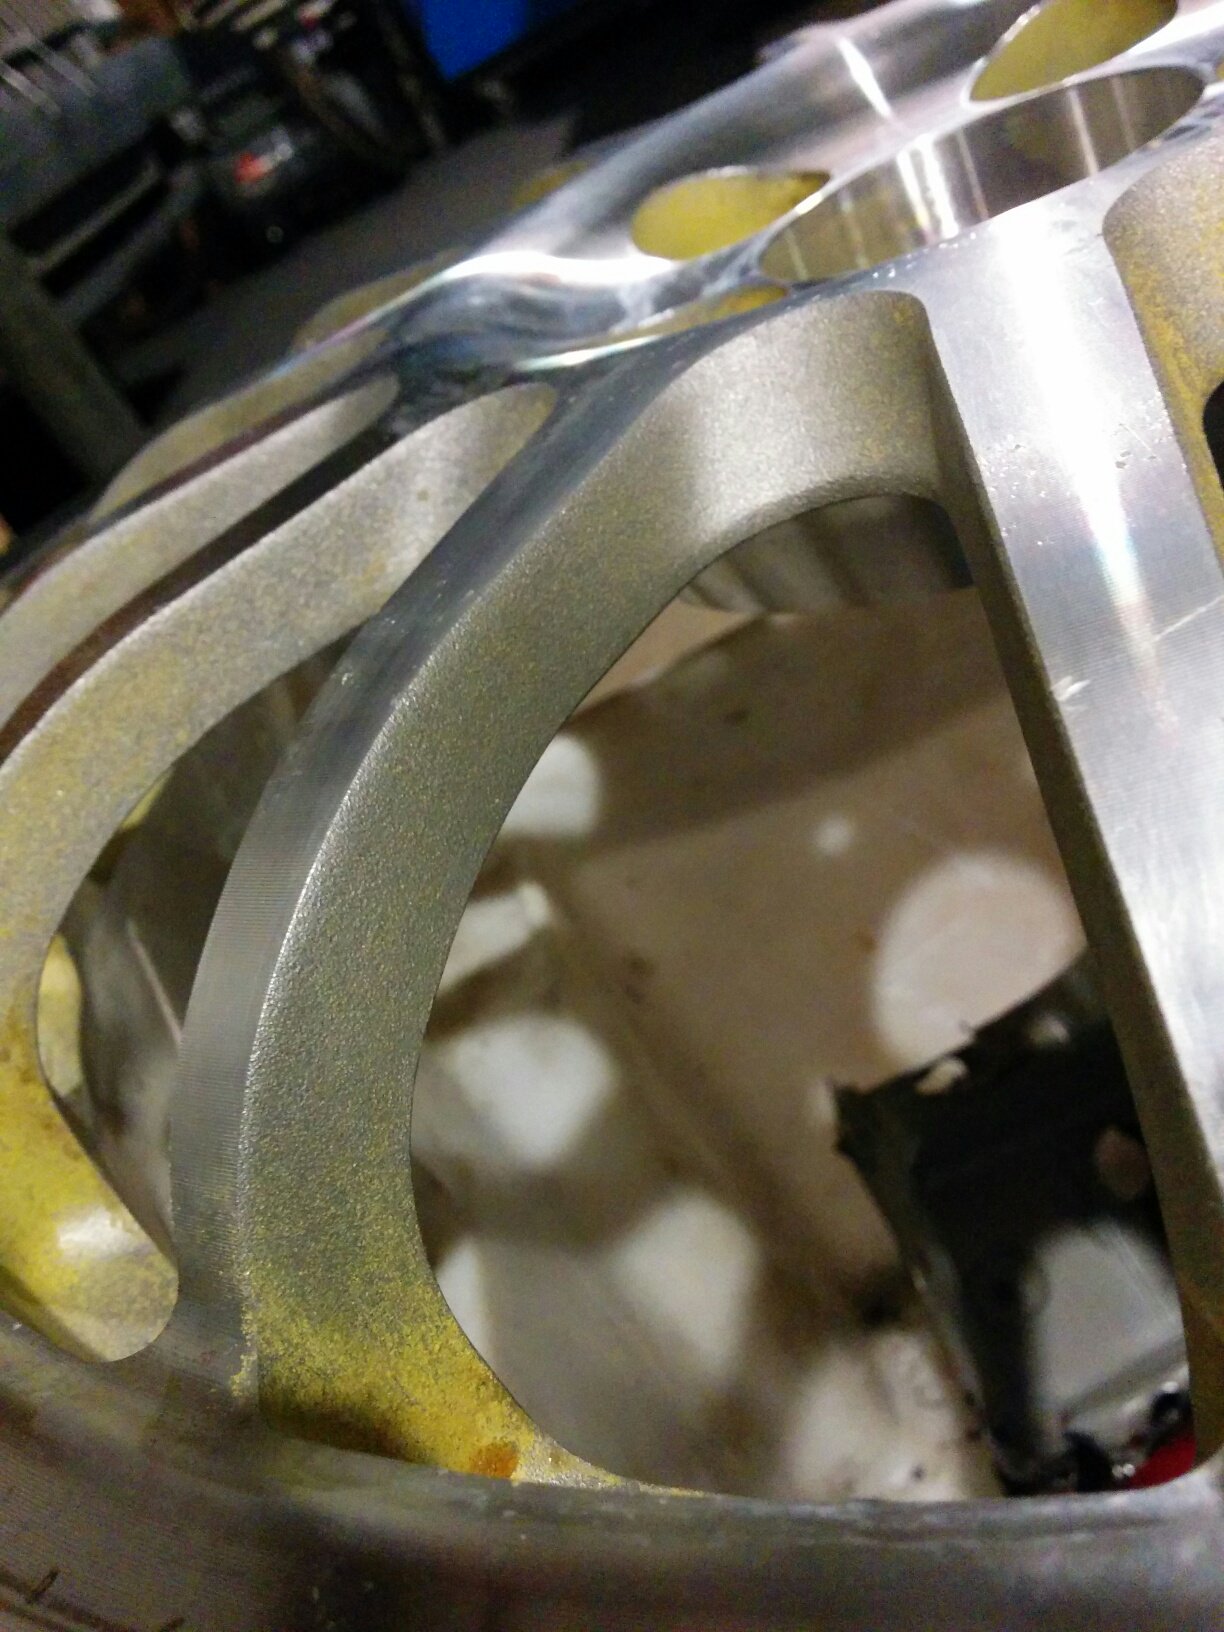
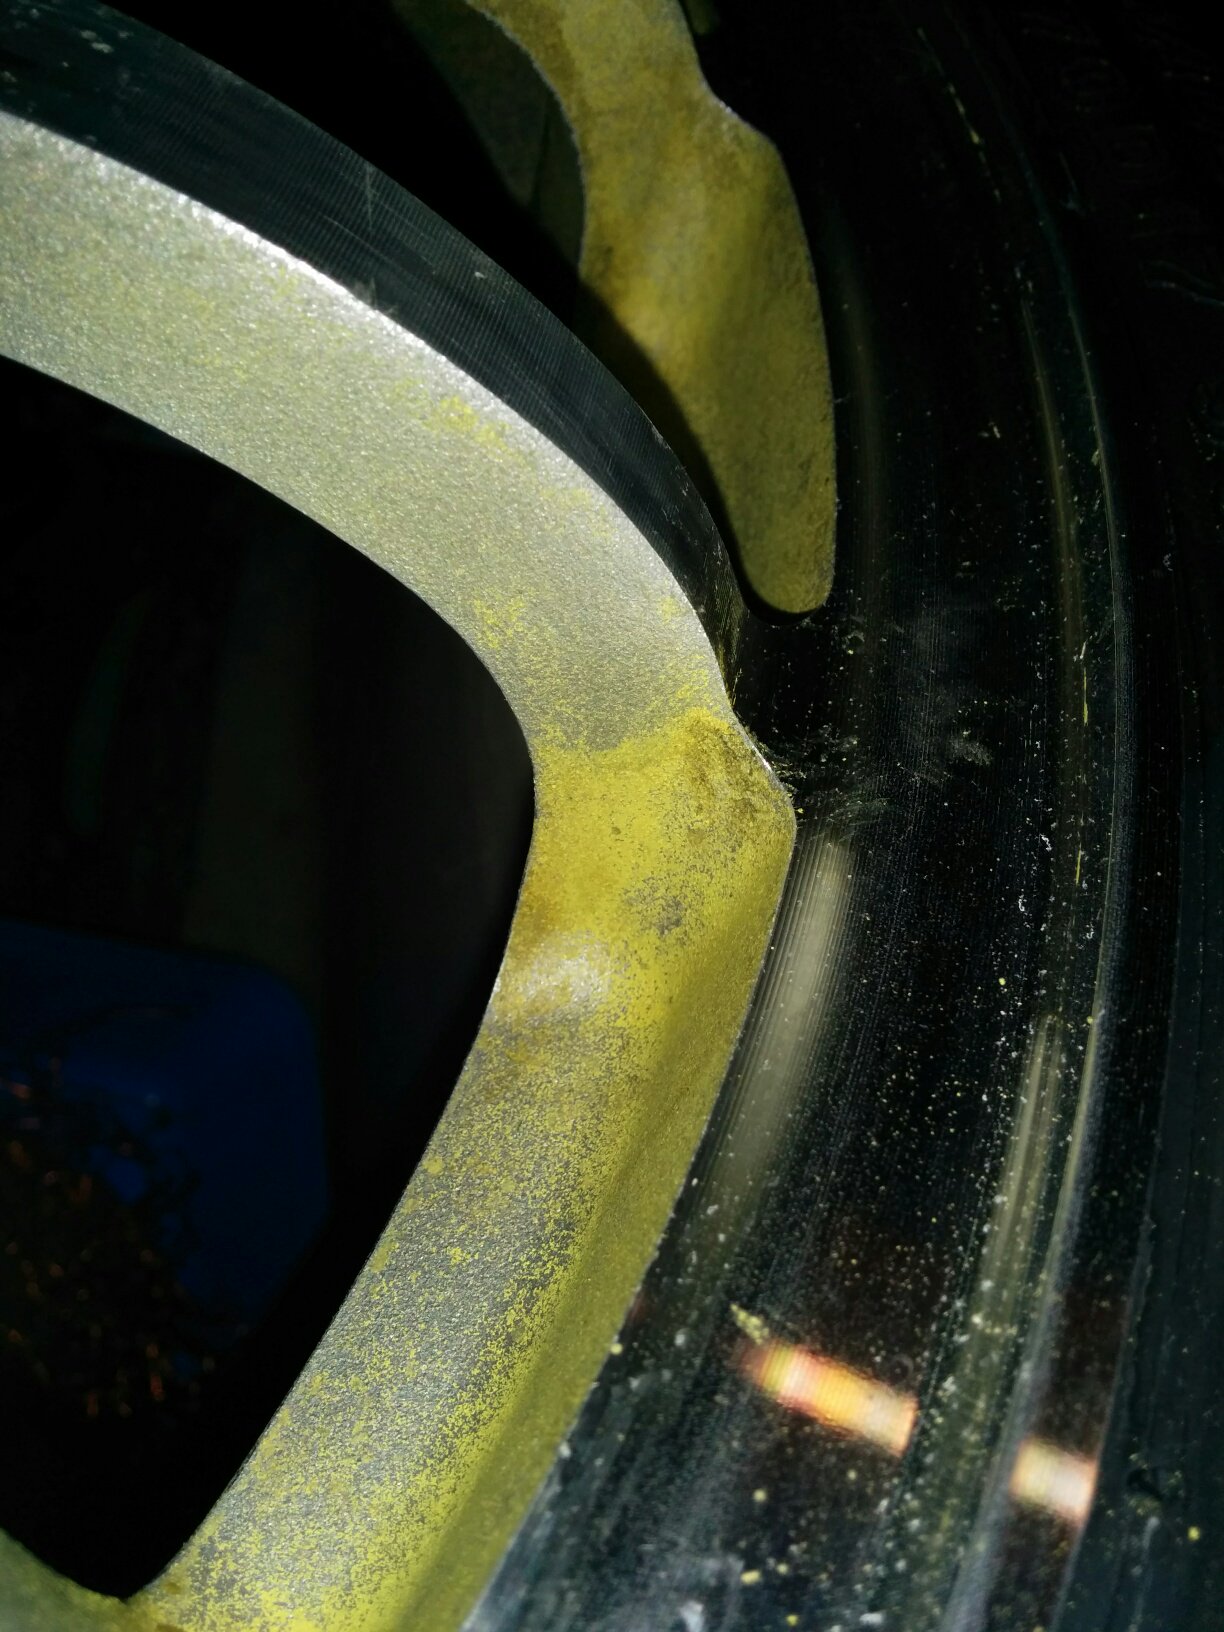

Basically, I'm doing no more stripping until I have a lasier/more efficient method.
Before centre field, after background/left: https://twitter.com/FredCookeNZ/status/ ... 7753469952
After centre field, before everywhere else: https://twitter.com/FredCookeNZ/status/ ... 5407862784
Border between scrubbed/not: https://twitter.com/FredCookeNZ/status/ ... 2911555584
Enkei logo cleaned up: https://twitter.com/FredCookeNZ/status/ ... 8047315968
Inlined:
Basically, I'm doing no more stripping until I have a lasier/more efficient method.
DIYEFI.org - where Open Source means Open Source, and Free means Freedom
FreeEMS.org - the open source engine management system
FreeEMS dev diary and its comments thread and my turbo truck!
n00bs, do NOT PM or email tech questions! Use the forum!
The ever growing list of FreeEMS success stories!
FreeEMS.org - the open source engine management system
FreeEMS dev diary and its comments thread and my turbo truck!
n00bs, do NOT PM or email tech questions! Use the forum!
The ever growing list of FreeEMS success stories!
Re: Fred's FreeEMS Powered 89 Ford Courier w/ Holset fed FE-
Got the last of my ARP kit in the mail today! :-D And some stickers. Surprise!

Of course, this doesn't actually mean any progress is going to happen because I still need to modify one of my heads and get it skimmed and order a special head gasket, but those are fairly high on the menu once the funds roll back in. At least, they need to be high on the menu if I want to get myself into deep trouble this summer :-D
Of course, this doesn't actually mean any progress is going to happen because I still need to modify one of my heads and get it skimmed and order a special head gasket, but those are fairly high on the menu once the funds roll back in. At least, they need to be high on the menu if I want to get myself into deep trouble this summer :-D
DIYEFI.org - where Open Source means Open Source, and Free means Freedom
FreeEMS.org - the open source engine management system
FreeEMS dev diary and its comments thread and my turbo truck!
n00bs, do NOT PM or email tech questions! Use the forum!
The ever growing list of FreeEMS success stories!
FreeEMS.org - the open source engine management system
FreeEMS dev diary and its comments thread and my turbo truck!
n00bs, do NOT PM or email tech questions! Use the forum!
The ever growing list of FreeEMS success stories!
Re: Fred's FreeEMS Powered 89 Ford Courier w/ Holset fed FE-
First car thing I've bought in four months! Here they are:


:-) Perfect for drag tyres on the rear end... mu ha ha ha :-D
:-) Perfect for drag tyres on the rear end... mu ha ha ha :-D
DIYEFI.org - where Open Source means Open Source, and Free means Freedom
FreeEMS.org - the open source engine management system
FreeEMS dev diary and its comments thread and my turbo truck!
n00bs, do NOT PM or email tech questions! Use the forum!
The ever growing list of FreeEMS success stories!
FreeEMS.org - the open source engine management system
FreeEMS dev diary and its comments thread and my turbo truck!
n00bs, do NOT PM or email tech questions! Use the forum!
The ever growing list of FreeEMS success stories!