
Great stuff! I need to get stuck in and order massive amounts of samples too. I've never even ordered one until now. This must change.
Will check out your PDF later, still in bed :-)
Project JAGuar for FreeEMS
Re: Project JAGuar for FreeEMS
DIYEFI.org - where Open Source means Open Source, and Free means Freedom
FreeEMS.org - the open source engine management system
FreeEMS dev diary and its comments thread and my turbo truck!
n00bs, do NOT PM or email tech questions! Use the forum!
The ever growing list of FreeEMS success stories!
FreeEMS.org - the open source engine management system
FreeEMS dev diary and its comments thread and my turbo truck!
n00bs, do NOT PM or email tech questions! Use the forum!
The ever growing list of FreeEMS success stories!
Re: Project JAGuar for FreeEMS
What's the diode to 12v for on your fp relay drive? the fets are limited inside, and the led diode will protect the led, so IMO it should exactly match the circuits on the next page for injectors. It's also missing a 100k to ground on the input.
Sorry, did the above an hour ago, wife wanted some attention... took her 4 pages to get me to put the laptop down, so dedicated... she's asleep now ;-)
Where was I...
LEDs on max99 outputs are experimental, however you can take them out if they give trouble. You should increase the resistance up to 2.4k or so, though, such that load on the RPM output is minimal. They'll still light at this level, just not as brightly, which is fine as they're just diagnostics anyway.
For your application the 5k resistors on the input to the max chip should be left unpopulated. This is VR only, just as the pull up is hall/opto/digital only.
For ALL applications the -ve input should NOT be grounded. Run it out to a connector pin for future VR use or just leave it not connected and floating for pure hall/opto/digital use.
You should decouple the max chip more, the recommendation is in the datasheet, 3 caps 1uF 0.1uF and something smaller? i think.
BRV = Battery Reference Voltage not Value. Also, this circuit is reversed from left to right, compared to the other ADC stuff.
All of the ADC circuits in RavAGE have yet to be tuned for cap values. As defaults, 0.22uF is fine with 0.1uF on the outside of the 470. For coolant and air temps you could put back the 1.0uF you had before and it could be beneficial. Values are tunable later anyway, but I thought I'd let you know. Coolant values are inappropriate, though, make them the same as IAT, whatever that ends up. Another thing is the map sensor, that should have 1k/0.22uF or 470ohm/0.47uF or some matching ratio. IE, bump up the cap or bump up the resistor for a bit more filtering.
Check the datasheet, but 0.1uF on the input to the max chip is bad/wrong and should be 0.1nF IIRC.
The analogue reference pin on the CPU should be supplied from the same regulator as the pullups and map sensors and tps etc. NOT the CPU supply. It looks wrong, but I find the CPU sheet a bit hard to follow.
I'm not sure if 4n25 optos will work, I don't know if they are fast enough for 115200 data. If you use them, and have issues, you can turn down the baud, but that's not good for logging resolution. RavAGE uses a faster part, but it's likely SMD only. You could try this, there is probably a pin compatible device that is faster if it gives you issues. Just noting it.
Time for skype with Dan about RavAGE so have to stop now. Let me know when the next revision is ready and I'll take another crack.
Fred.
DIYEFI.org - where Open Source means Open Source, and Free means Freedom
FreeEMS.org - the open source engine management system
FreeEMS dev diary and its comments thread and my turbo truck!
n00bs, do NOT PM or email tech questions! Use the forum!
The ever growing list of FreeEMS success stories!
FreeEMS.org - the open source engine management system
FreeEMS dev diary and its comments thread and my turbo truck!
n00bs, do NOT PM or email tech questions! Use the forum!
The ever growing list of FreeEMS success stories!
-
DeuceEFI
- LQFP144 - On Top Of The Game
- Posts: 579
- Joined: Thu Feb 25, 2010 3:57 am
- Location: Gosport, IN USA
- Contact:
Re: Project JAGuar for FreeEMS
I have updated my schematics per Fred's excellent suggestions  and also created a new Jaguar-Schematic.pdf file...
They are in my git repository ready for comments
Fred, do we have a decoder written for the patterns that I uploaded the pic of or is that something that still needs to be done?
I will work on the documents mentioned in the TODO.md file next, mainly the BOM and the assembly instructions now that we are getting closer to a workable design.
Thanks for all your hard work!
Andy
Andy.
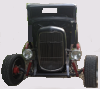
FreeEMS vehicle #11, 1932 Ford 5 Window Coupe with a 1996 GM 3.1L SFI V6 with DIS ignition
FreeEMS vehicle #16, 1996 Chevrolet S10 2.2L SFI I4 with DIS ignition
Owner of http://www.coolefi.com
FreeEMS vehicle #11, 1932 Ford 5 Window Coupe with a 1996 GM 3.1L SFI V6 with DIS ignition
FreeEMS vehicle #16, 1996 Chevrolet S10 2.2L SFI I4 with DIS ignition
Owner of http://www.coolefi.com
-
DeuceEFI
- LQFP144 - On Top Of The Game
- Posts: 579
- Joined: Thu Feb 25, 2010 3:57 am
- Location: Gosport, IN USA
- Contact:
Re: Project JAGuar for FreeEMS
My sampling this round...
From st.com I requested the following samples:
VNB20N07 20A, RDS=50mOhm
VNB20N0713TR 20A, RDS=50mOhm
VND10N06 10A, RDS=150mOhm (worst one for heat)
VND7NV04 6A, RDS=60mOhm
VND7N0413TR 6A, RDS=60mOhm
VNN7NV0413TR 6A, RDS=60mOhm
They aren't the ones I spec'ed out in my schematic, but I got a few of each for testing as most had an RDS of less that 100mOhm (except for the VND10N06) and as you can see I got a variety of sizes...
VND = DPAK
VNB = D2PAK
VNN = SOT223
From te.com I requested:
Super Seal 1.0mm 34 Position Plug 4-1437290-0 Quantity:1
Super Seal 1.0mm 34 Position Recepticle 6437288-1 Quantity:1
Super Seal 1.0mm 26 Position Plug 3-1437290-7 Quantity:1
Super Seal 1.0mm 26 Position Recepticle 6437288-6 Quantity:1
Wire Range = 0.50-0.90²mm [20-18 AWG] Copper Alloy Contact Base Material 1437284-9 Quantity:50
Wire Range = 1.25-2.00²mm [16-14 AWG] Copper Alloy Contact Base Material 1-1437284-0 Quantity:50
Wire Range = 0.50-0.60²mm [20 AWG] Stainless Steel Contact Base Material 3-1447221-4 Quantity:50
Wire Range = 0.75-1.25²mm [18-16 AWG] Stainless Steel Contact Base Material 3-1447221-3 Quantity:10
As for the enclosures, I purchased them locally at Frys Electronics, frys.com so I am unsure if they are available elsewhere since I have looked too much...
These are the same style enclosures that the other EMS uses... you know the closed source and DB-37 loving ones that we all started out with?
In looking around, I found:
http://www.sanjosescientific.com/servle ... Categories
Where it lists the sizes and prices in USD for the enclosures that I bought.
Here is the link to the one sitting on my desk right now...
http://www.sanjosescientific.com/servle ... %22/Detail
But no free samples on this one
Andy.
FreeEMS vehicle #11, 1932 Ford 5 Window Coupe with a 1996 GM 3.1L SFI V6 with DIS ignition
FreeEMS vehicle #16, 1996 Chevrolet S10 2.2L SFI I4 with DIS ignition
Owner of http://www.coolefi.com
FreeEMS vehicle #11, 1932 Ford 5 Window Coupe with a 1996 GM 3.1L SFI V6 with DIS ignition
FreeEMS vehicle #16, 1996 Chevrolet S10 2.2L SFI I4 with DIS ignition
Owner of http://www.coolefi.com
Re: Project JAGuar for FreeEMS
Later today, no problems! I feel spoilt working with guys like you and Dan and Preston :-)DeuceEFI wrote:I have updated my schematics per Fred's excellent suggestions :-) and also created a new Jaguar-Schematic.pdf file...
They are in my git repository ready for comments :-)
I searched through all of your posts and didn't find it. Probably blind. Link me? :-)Fred, do we have a decoder written for the patterns that I uploaded the pic of or is that something that still needs to be done?
Cool, I'll take a look at that too. I didn't notice it before. It sounds like you're making a full blown design. Not very DIY if you ask me... might need its own section ;-) Let me know if you'd like that. I like the concept, small and minimalist with mostly TH stuff. Like what this other design used to be, almost... :-) Might need to put a new section up and file unfinished/unmaintained/unstarted stuff there too.I will work on the documents mentioned in the TODO.md file next, mainly the BOM and the assembly instructions now that we are getting closer to a workable design.
Neat! I have just the project for that :-)DeuceEFI wrote:VNN7NV0413TR 6A, RDS=60mOhm
I had a read of the spec for them, the testing is impressive! Nice choice.From te.com I requested: [lots of] Super Seal [parts]
Question: Pinning, what sort of ground/power scheme are you planning?
I've got news for you, and it's this: I was heavily interested in DIY EFI long before MS existed at all. Dave of MTX fame is in the same camp. The DIY community was strong and growing when it got first fragmented by the 332 project and then dissolved/stolen by the MS project. It's a shame that the community faded like it did. We are now ramping up a new community with the same spirit as the old one had at the start. Sorry for the rant, but I wanted it to be clear that, at least I, didn't start there. :-)you know the closed source and DB-37 loving ones that we all started out with?
Ahhh, thanks! I see that site only ships to the US, that's a shame, one of them looks ideal for a top secret project that I have in mind :-)In looking around, I found:
http://www.sanjosescientific.com/servle ... Categories
Where it lists the sizes and prices in USD for the enclosures that I bought.
Here is the link to the one sitting on my desk right now...
http://www.sanjosescientific.com/servle ... %22/Detail
I appreciate the details, all the same! Thanks :-)
Fred.
DIYEFI.org - where Open Source means Open Source, and Free means Freedom
FreeEMS.org - the open source engine management system
FreeEMS dev diary and its comments thread and my turbo truck!
n00bs, do NOT PM or email tech questions! Use the forum!
The ever growing list of FreeEMS success stories!
FreeEMS.org - the open source engine management system
FreeEMS dev diary and its comments thread and my turbo truck!
n00bs, do NOT PM or email tech questions! Use the forum!
The ever growing list of FreeEMS success stories!
Re: Project JAGuar for FreeEMS
Just pushed a small update.
Done! :-)
Code: Select all
git remote add freds git://github.com/fredcooke/Jaguar.git
git fetch freds
git merge --ff-only freds/masterDIYEFI.org - where Open Source means Open Source, and Free means Freedom
FreeEMS.org - the open source engine management system
FreeEMS dev diary and its comments thread and my turbo truck!
n00bs, do NOT PM or email tech questions! Use the forum!
The ever growing list of FreeEMS success stories!
FreeEMS.org - the open source engine management system
FreeEMS dev diary and its comments thread and my turbo truck!
n00bs, do NOT PM or email tech questions! Use the forum!
The ever growing list of FreeEMS success stories!
Re: Project JAGuar for FreeEMS
Ahhhhhhh, uploaded meant commited/pushed:
https://github.com/fredcooke/Jaguar/blo ... -Graph.png
Yes, even teeth + 1 should work fine for that. I'll help you configure it when the time comes.
What about the ignition output details, though, can you post links/info about that please?
Fred.
https://github.com/fredcooke/Jaguar/blo ... -Graph.png
Yes, even teeth + 1 should work fine for that. I'll help you configure it when the time comes.
What about the ignition output details, though, can you post links/info about that please?
Fred.
DIYEFI.org - where Open Source means Open Source, and Free means Freedom
FreeEMS.org - the open source engine management system
FreeEMS dev diary and its comments thread and my turbo truck!
n00bs, do NOT PM or email tech questions! Use the forum!
The ever growing list of FreeEMS success stories!
FreeEMS.org - the open source engine management system
FreeEMS dev diary and its comments thread and my turbo truck!
n00bs, do NOT PM or email tech questions! Use the forum!
The ever growing list of FreeEMS success stories!
Re: Project JAGuar for FreeEMS
OK, review time:
Why are there jumpers on the IAT/CHT sensors?
BRV circuit is still visually reversed left/right mirror image of the other circuits, this is purely a cosmetic complaint.
I'm unsure if your jumper setup will work on the max99 chip, but you don't need to be that complicated. What you need are two more connector pins. For VR you want to bring in two wires, one for each side, as a differential input. For hall you just leave the -ve one disconnected. As pointed out by someone else in another thread, calling it ground is technically wrong. Configure it in A2 mode and run the extra two traces to the connector and call it good. If this still isn't clear, feel free to discuss first. Do you have skype? If so, we can have a chat about it.
CPU Sheet: Wow, what an improvement! :-)
Config resistors are correct, but you should chuck MODA and MODB on the CPU symbol labels. Might be clearer to do it like this too "PE7 / XCLKS" with the pin number first and function second.
Are you planning tants on the cpu power pins? just 2 of them can benefit from it. The 0.22uF are still needed and are correct for the others. 10uF 10v would be a good choice if you do that. VDDR1 and VDDR2 are the pins for that, check the datasheet to confirm that I'm right.
Right now, your CPU would melt. VDD1 and VDD2 should be just connected to an external cap, they are internal 2.5V refs. Check the data sheet to confirm that I got the pins right. This is what you get for copying Puma... :-)
Your config for the CPU sheet should be similar/same as RavAGE with the only difference being C11 and C12 from ravage not applicable (144 pin package pins only).
There is no connector sheet.
Are there ground symbols/bus types in kicad? I find it hard to read the grounds/powers they way they are now being the same as the other connections. If they're available maybe you should consider using them. You might get some DRC checking as a bonus for that?
Great progress :-) Seems like your bad etch was a good thing ;-)
Fred.
DIYEFI.org - where Open Source means Open Source, and Free means Freedom
FreeEMS.org - the open source engine management system
FreeEMS dev diary and its comments thread and my turbo truck!
n00bs, do NOT PM or email tech questions! Use the forum!
The ever growing list of FreeEMS success stories!
FreeEMS.org - the open source engine management system
FreeEMS dev diary and its comments thread and my turbo truck!
n00bs, do NOT PM or email tech questions! Use the forum!
The ever growing list of FreeEMS success stories!
-
DeuceEFI
- LQFP144 - On Top Of The Game
- Posts: 579
- Joined: Thu Feb 25, 2010 3:57 am
- Location: Gosport, IN USA
- Contact:
Re: Project JAGuar for FreeEMS
Go ahead and make a new section for this and we will make it an projectFred wrote:Cool, I'll take a look at that too. I didn't notice it before. It sounds like you're making a full blown design. Not very DIY if you ask me... might need its own sectionDeuceEFI wrote:I will work on the documents mentioned in the TODO.md file next, mainly the BOM and the assembly instructions now that we are getting closer to a workable design.Let me know if you'd like that. I like the concept, small and minimalist with mostly TH stuff. Like what this other design used to be, almost...
My plan is to:Fred wrote:Question: Pinning, what sort of ground/power scheme are you planning?
1. Injectors and the Fuel Pump relay will share a High Inductive load ground
2. the CPU and Sensors will share a common ground
3. 3 separate externally fused and switched +12vdc inputs, one for each voltage regulator and one for the BRV.
Here again if there is a flaw in my thinking, let me know
DeuceEFI wrote:you know the closed source and DB-37 loving ones that we all started out with?
Sorry for my assumptionFred wrote:I've got news for you, and it's this: I was heavily interested in DIY EFI long before MS existed at all. Dave of MTX fame is in the same camp. The DIY community was strong and growing when it got first fragmented by the 332 project and then dissolved/stolen by the MS project. It's a shame that the community faded like it did. We are now ramping up a new community with the same spirit as the old one had at the start. Sorry for the rant, but I wanted it to be clear that, at least I, didn't start there.
I started years ago modifying GM 7737 ECMs for my 1985 V-6 Fiero and my 1991 S10/1950 GMC 100 4x4 pickup and couldn't afford any commerical offerings at the time so I just put up with those modifications until I stumbled across the FreeEMS project when it started up.
I wanted to learn more about EFI and bought an MS-II for the Deuce coupe while waiting for your code to mature enough to run it's first engine and I have been hooked ever since and I try to help out however I can.
I have two GM v-6 engines we can test with, both configured the same (one is an 1989 and the other is a 1996 and they use the same GM sensor part numbers, LOL) plus I have a Toyota Matrix 1.8L 4cylinder on a test stand; I pulled it out of my wife's car with 250k miles on it, it was replaced with a new one when the original engine developed a knock so we are free to play with it which will benefit the Ravage project...
Andy
Andy.
FreeEMS vehicle #11, 1932 Ford 5 Window Coupe with a 1996 GM 3.1L SFI V6 with DIS ignition
FreeEMS vehicle #16, 1996 Chevrolet S10 2.2L SFI I4 with DIS ignition
Owner of http://www.coolefi.com
FreeEMS vehicle #11, 1932 Ford 5 Window Coupe with a 1996 GM 3.1L SFI V6 with DIS ignition
FreeEMS vehicle #16, 1996 Chevrolet S10 2.2L SFI I4 with DIS ignition
Owner of http://www.coolefi.com
Re: Project JAGuar for FreeEMS
OK, I'll give it a section in a day or two when I get time.
Your ground/power plan is fine, though you can quite happily get away with one power source for both regulators as there is no noisy or excessive load on either of them. It's good to have the 12v separate, but again, because you have nothing noisy on there, you could get away without it, but I'd still use one. I'd say switch to two, one for brv one for power, with a relay each, relay controlled by the key power, and you're good to go.
No need to apologise :-) MS2Extra 2.0 Alpha was my first EMS, and I certainly learned a lot from the community that surrounds it, and even the project itself, but I'm well past that now, and there have been plenty of other influences besides them, particularly SDS in the early days, and OEMs and experimentation and so on. That old ECU ran my truck until I swapped it to FreeEMS early last year, same code, almost same tune, 4 years, if it aint broke, don't fix it, right? :-)
I look forward to the feedback :-)
Fred.
DIYEFI.org - where Open Source means Open Source, and Free means Freedom
FreeEMS.org - the open source engine management system
FreeEMS dev diary and its comments thread and my turbo truck!
n00bs, do NOT PM or email tech questions! Use the forum!
The ever growing list of FreeEMS success stories!
FreeEMS.org - the open source engine management system
FreeEMS dev diary and its comments thread and my turbo truck!
n00bs, do NOT PM or email tech questions! Use the forum!
The ever growing list of FreeEMS success stories!