Fred's 1983 KP60 Toyota Starlet, take 2!

Re: Fred's 1983 KP60 Toyota Starlet, take 2!
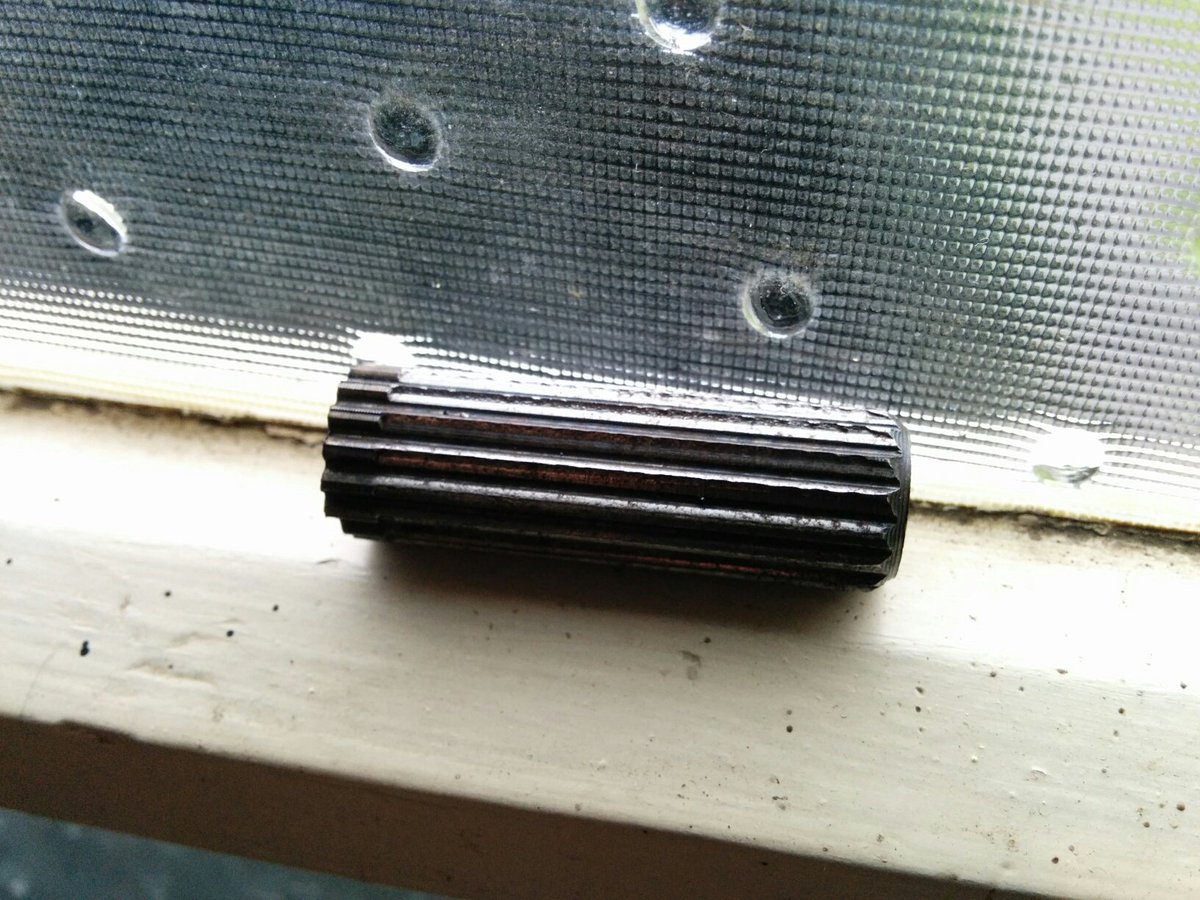
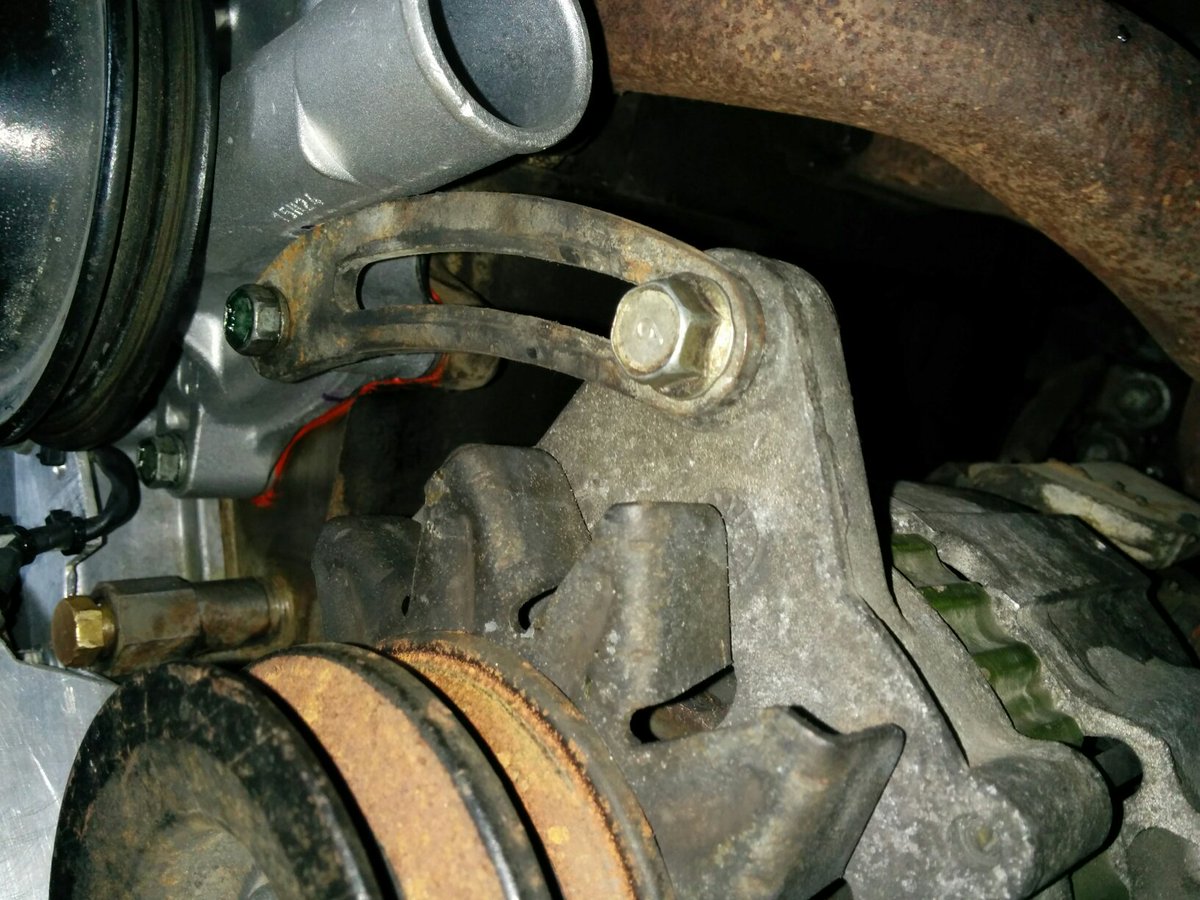
Had a crack at fitting that alternator up tonight, just now, out of curiosity. Couldn't really get it close to where it'd sit due to the vacuum pump drive hanging too far out and fowling the exhaust manifold. So tomorrow when it's not nearly midnight I'll slice it off with the angle grinder. I tried with a hacksaw, but it's far too hard. I might have to mount the bottom part a bit lower than the stock one or find a higher place to put an adjuster, or some such. The V size is OK though, and having two gives me twice as many mounting options as just one would :-). The single pulley from the 4K alternator has a smaller shaft size and couldn't be used. This pulley is also larger in diameter and will thus spin more slowly, which is good, as the borrowed pully I have for the VR setup is larger than stock and was over driving the water pump (good) and alternator (bad). Should charge fine at idle due to that pulley being on the engine. Gave it a degrease and scrub and headed back up to right this. Now off to a more important thread to have a read, and perhaps post something. XXOO
DIYEFI.org - where Open Source means Open Source, and Free means Freedom
FreeEMS.org - the open source engine management system
FreeEMS dev diary and its comments thread and my turbo truck!
n00bs, do NOT PM or email tech questions! Use the forum!
The ever growing list of FreeEMS success stories!
FreeEMS.org - the open source engine management system
FreeEMS dev diary and its comments thread and my turbo truck!
n00bs, do NOT PM or email tech questions! Use the forum!
The ever growing list of FreeEMS success stories!
Re: Fred's 1983 KP60 Toyota Starlet, take 2!
A few alternator pics from yesterday, and a few more from today, in order, tweets then inlined pics:
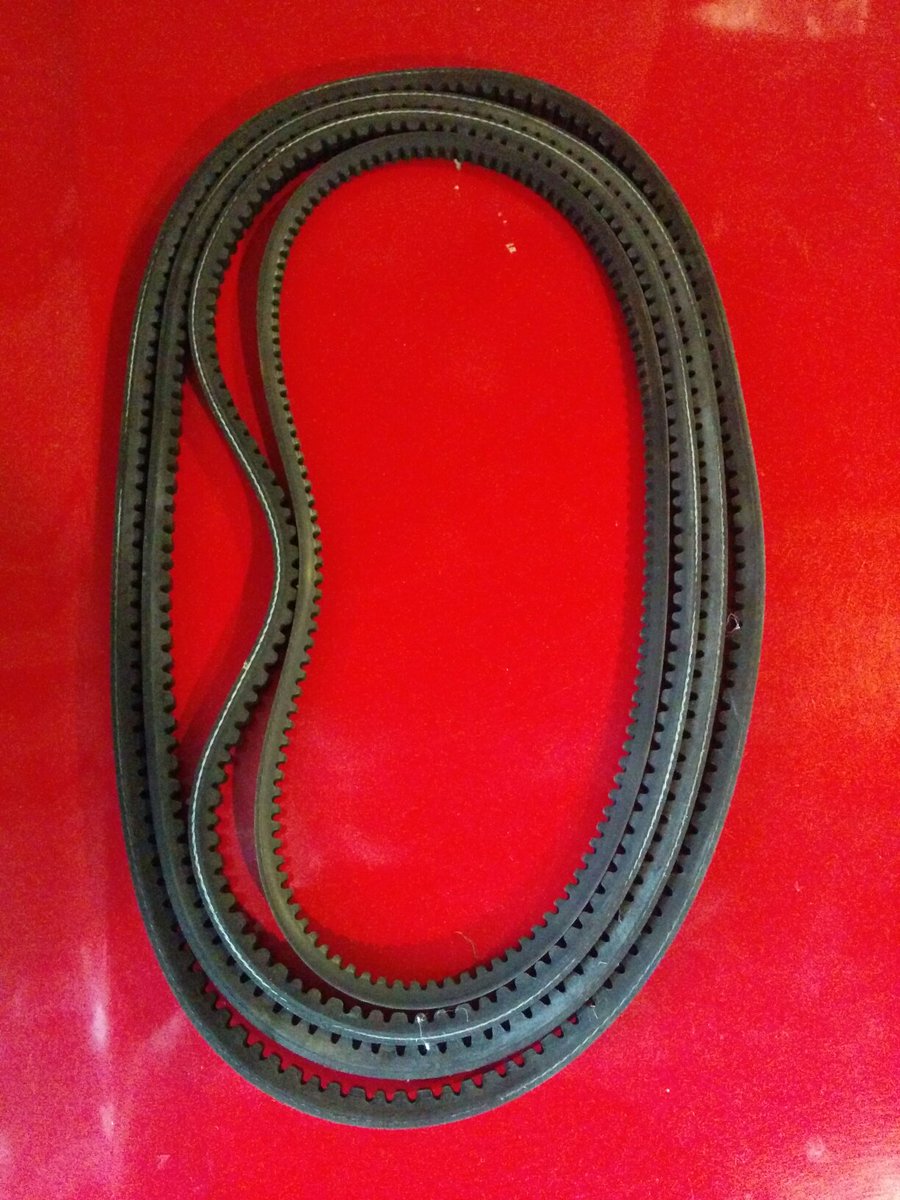
Random selection of belts: https://twitter.com/FredCookeNZ/status/ ... 7876165634
Diced off vacuum pump drive: https://twitter.com/FredCookeNZ/status/ ... 2898449409
12mm of spacers make it snug: https://twitter.com/FredCookeNZ/status/ ... 3198036992
Mocked up on the engine: https://twitter.com/FredCookeNZ/status/ ... 4149443584
Good alignment with overly thick belt: https://twitter.com/FredCookeNZ/status/ ... 0004590592
Showing size discrepancy of ~27mm: https://twitter.com/FredCookeNZ/status/ ... 3282069504
Adjustment bar hard up on water pump: https://twitter.com/FredCookeNZ/status/ ... 4787765248
Galv angle that I didn't end up using: https://twitter.com/FredCookeNZ/status/ ... 4811443200
Rusty 3mm plate cut and drilled: https://twitter.com/FredCookeNZ/status/ ... 2694293511
Rusty 3mm plate soaking in oxalic: https://twitter.com/FredCookeNZ/status/ ... 0308078592
Inlined images:


Will try to get that fitted up for good tomorrow night, but we'll see how I get on with more urgent chores.
Random selection of belts: https://twitter.com/FredCookeNZ/status/ ... 7876165634
Diced off vacuum pump drive: https://twitter.com/FredCookeNZ/status/ ... 2898449409
12mm of spacers make it snug: https://twitter.com/FredCookeNZ/status/ ... 3198036992
Mocked up on the engine: https://twitter.com/FredCookeNZ/status/ ... 4149443584
Good alignment with overly thick belt: https://twitter.com/FredCookeNZ/status/ ... 0004590592
Showing size discrepancy of ~27mm: https://twitter.com/FredCookeNZ/status/ ... 3282069504
Adjustment bar hard up on water pump: https://twitter.com/FredCookeNZ/status/ ... 4787765248
Galv angle that I didn't end up using: https://twitter.com/FredCookeNZ/status/ ... 4811443200
Rusty 3mm plate cut and drilled: https://twitter.com/FredCookeNZ/status/ ... 2694293511
Rusty 3mm plate soaking in oxalic: https://twitter.com/FredCookeNZ/status/ ... 0308078592
Inlined images:
Will try to get that fitted up for good tomorrow night, but we'll see how I get on with more urgent chores.
DIYEFI.org - where Open Source means Open Source, and Free means Freedom
FreeEMS.org - the open source engine management system
FreeEMS dev diary and its comments thread and my turbo truck!
n00bs, do NOT PM or email tech questions! Use the forum!
The ever growing list of FreeEMS success stories!
FreeEMS.org - the open source engine management system
FreeEMS dev diary and its comments thread and my turbo truck!
n00bs, do NOT PM or email tech questions! Use the forum!
The ever growing list of FreeEMS success stories!
Re: Fred's 1983 KP60 Toyota Starlet, take 2!
Currently banned from the garage, so it's all bench racing for now. Someone mentioned their speed in 5th with a J160 and 8k redline on little 235/45R13 tyres with 545mm tyres, so naturally I had to check and it was indeed just over 200kph. Which got me thinking about the ute and the KP, so I'll dump the KP calcs here for future reference:
J160 ratios from interwebs
Tyre size is highly likely to be 195/50R15 which according to earlier posts is 22.7 inches and according to a calculator, 576.580mm.
No, wait, checking R888 specs as that's what I'll probably run, and the US site says 22.6 inches which calcs to 574.040mm and the UK site says 572mm. 22.5 yields 571.5 so I'm going to assume that it's 572.499 which I'll round up to 572.5 for ease :-p
The general formula is simply (((PI * TyreDiameter * MaxRPM * 60MinutesInAnHour) / 1000000MillimetersInAkilometer) / DiffRatio) / GearRatio
Which for this car is just (((PI * 572.5 * 8000 * 60) / 1000000) / DiffRatio) / GearRatio
3.9 option
And for this ratio is (((PI * 572.5 * 8000 * 60) / 1000000) / 3.909) / GearRatio
And for this ratio is (((PI * 572.5 * 8000 * 60) / 1000000) / 4.100) / GearRatio
EDIT: Added this ratio.
And for this ratio is (((PI * 572.5 * 8000 * 60) / 1000000) / 4.300) / GearRatio
And for this ratio is (((PI * 572.5 * 8000 * 60) / 1000000) / 4.444) / GearRatio
According to a calculator mid 12s and 180kph at the end of a strip. According to others results 13.8 @ 160kph
That might make the 3.9 the best due to the lack of need to shift out of fourth and thus only 3 shift dead times.
If it's a bit slower, 4.1 would be better. But what if I build a higher capacity engine with hotter than stock cams later?
It'd depend on which circuit, but I imagine I'd be up against the limiter in sixth with the 4.4 on any reasonable straight.
Street, motorway pulls are fun :-p But so is cruising, how about cruise RPM at 100, 110, 120 in each? DONE, 3.9 wins.
Creeping in 1st at low speed is fun. I'll add a line to each diff ratio for that... No, no I won't. Div 10 for 800 idle.
So the range of first gear creeping is 5kph to 6kph (of course), and all are fine.
In summary, 4.4 ruled out, strongly favouring 3.9. Interesting, as I'd not thought about this for this car, yet.
Similarly interesting, with the FD box in the ute, 3.9 is my ratio of choice, too. but a much higher top speed with larger tyre diameter and taller top.
Special Thanks
Piimae for his inspiration, and distraction, me for my failure to focus on what matters right now. #FAIL.
J160 ratios from interwebs
- First Gear: 3.874
- Second Gear: 2.175
- Third Gear: 1.484
- Fourth Gear: 1.223
- Fifth Gear: 1.000
- Sixth Gear: 0.869
Tyre size is highly likely to be 195/50R15 which according to earlier posts is 22.7 inches and according to a calculator, 576.580mm.
No, wait, checking R888 specs as that's what I'll probably run, and the US site says 22.6 inches which calcs to 574.040mm and the UK site says 572mm. 22.5 yields 571.5 so I'm going to assume that it's 572.499 which I'll round up to 572.5 for ease :-p
The general formula is simply (((PI * TyreDiameter * MaxRPM * 60MinutesInAnHour) / 1000000MillimetersInAkilometer) / DiffRatio) / GearRatio
Which for this car is just (((PI * 572.5 * 8000 * 60) / 1000000) / DiffRatio) / GearRatio
3.9 option
And for this ratio is (((PI * 572.5 * 8000 * 60) / 1000000) / 3.909) / GearRatio
- First Gear: (((PI * 572.5 * 8000 * 60) / 1000000) / 3.909) / 3.874 = 57.0
- Second Gear: (((PI * 572.5 * 8000 * 60) / 1000000) / 3.909) / 2.175 = 101.5
- Third Gear: (((PI * 572.5 * 8000 * 60) / 1000000) / 3.909) / 1.484 = 148.8
- Fourth Gear: (((PI * 572.5 * 8000 * 60) / 1000000) / 3.909) / 1.223 = 180.6
- Fifth Gear: (((PI * 572.5 * 8000 * 60) / 1000000) / 3.909) / 1.000 = 220.9
- Sixth Gear: (((PI * 572.5 * 8000 * 60) / 1000000) / 3.909) / 0.869 = 254.1
- 100/254.1 * 8000 = 3148 RPM
- 110/254.1 * 8000 = 3463 RPM
- 120/254.1 * 8000 = 3778 RPM
And for this ratio is (((PI * 572.5 * 8000 * 60) / 1000000) / 4.100) / GearRatio
- First Gear: (((PI * 572.5 * 8000 * 60) / 1000000) / 4.100) / 3.874 = 54.4
- Second Gear: (((PI * 572.5 * 8000 * 60) / 1000000) / 4.100) / 2.175 = 96.8
- Third Gear: (((PI * 572.5 * 8000 * 60) / 1000000) / 4.100) / 1.484 = 141.9
- Fourth Gear: (((PI * 572.5 * 8000 * 60) / 1000000) / 4.100) / 1.223 = 172.2
- Fifth Gear: (((PI * 572.5 * 8000 * 60) / 1000000) / 4.100) / 1.000 = 210.6
- Sixth Gear: (((PI * 572.5 * 8000 * 60) / 1000000) / 4.100) / 0.869 = 242.3
- 100/242.3 * 8000 = 3301 RPM
- 110/242.3 * 8000 = 3631 RPM
- 120/242.3 * 8000 = 3962 RPM
EDIT: Added this ratio.
And for this ratio is (((PI * 572.5 * 8000 * 60) / 1000000) / 4.300) / GearRatio
- First Gear: (((PI * 572.5 * 8000 * 60) / 1000000) / 4.300) / 3.874 = 51.8
- Second Gear: (((PI * 572.5 * 8000 * 60) / 1000000) / 4.300) / 2.175 = 92.3
- Third Gear: (((PI * 572.5 * 8000 * 60) / 1000000) / 4.300) / 1.484 = 135.3
- Fourth Gear: (((PI * 572.5 * 8000 * 60) / 1000000) / 4.300) / 1.223 = 164.2
- Fifth Gear: (((PI * 572.5 * 8000 * 60) / 1000000) / 4.300) / 1.000 = 200.8
- Sixth Gear: (((PI * 572.5 * 8000 * 60) / 1000000) / 4.300) / 0.869 = 231.0
- 100/231.0 * 8000 = 3463 RPM
- 110/231.0 * 8000 = 3809 RPM
- 120/ * 8000 = 4155 RPM
And for this ratio is (((PI * 572.5 * 8000 * 60) / 1000000) / 4.444) / GearRatio
- First Gear: (((PI * 572.5 * 8000 * 60) / 1000000) / 4.444) / 3.874 = 50.1
- Second Gear: (((PI * 572.5 * 8000 * 60) / 1000000) / 4.444) / 2.175 = 89.3
- Third Gear: (((PI * 572.5 * 8000 * 60) / 1000000) / 4.444) / 1.484 = 130.9
- Fourth Gear: (((PI * 572.5 * 8000 * 60) / 1000000) / 4.444) / 1.223 = 158.8
- Fifth Gear: (((PI * 572.5 * 8000 * 60) / 1000000) / 4.444) / 1.000 = 194.3
- Sixth Gear: (((PI * 572.5 * 8000 * 60) / 1000000) / 4.444) / 0.869 = 223.5
- 100/223.5 * 8000 = 3579 RPM
- 110/223.5 * 8000 = 3937 RPM
- 120/223.5 * 8000 = 4295 RPM
According to a calculator mid 12s and 180kph at the end of a strip. According to others results 13.8 @ 160kph
That might make the 3.9 the best due to the lack of need to shift out of fourth and thus only 3 shift dead times.
If it's a bit slower, 4.1 would be better. But what if I build a higher capacity engine with hotter than stock cams later?
It'd depend on which circuit, but I imagine I'd be up against the limiter in sixth with the 4.4 on any reasonable straight.
Street, motorway pulls are fun :-p But so is cruising, how about cruise RPM at 100, 110, 120 in each? DONE, 3.9 wins.
Creeping in 1st at low speed is fun. I'll add a line to each diff ratio for that... No, no I won't. Div 10 for 800 idle.
So the range of first gear creeping is 5kph to 6kph (of course), and all are fine.
In summary, 4.4 ruled out, strongly favouring 3.9. Interesting, as I'd not thought about this for this car, yet.
Similarly interesting, with the FD box in the ute, 3.9 is my ratio of choice, too. but a much higher top speed with larger tyre diameter and taller top.
Special Thanks
Piimae for his inspiration, and distraction, me for my failure to focus on what matters right now. #FAIL.
Last edited by Fred on Fri Feb 12, 2021 5:35 am, edited 1 time in total.
Reason: Add 4.3 ratio and remove 'non' from 4.4 - keep an open mind.
Reason: Add 4.3 ratio and remove 'non' from 4.4 - keep an open mind.
DIYEFI.org - where Open Source means Open Source, and Free means Freedom
FreeEMS.org - the open source engine management system
FreeEMS dev diary and its comments thread and my turbo truck!
n00bs, do NOT PM or email tech questions! Use the forum!
The ever growing list of FreeEMS success stories!
FreeEMS.org - the open source engine management system
FreeEMS dev diary and its comments thread and my turbo truck!
n00bs, do NOT PM or email tech questions! Use the forum!
The ever growing list of FreeEMS success stories!
Frontal Air Inlet Requirements
What needs to suck air in through the front of the car, NA edition:
Thinking about the KP, and wanting it to look stock on the outside, the layout should roughly be:


Looking at those again, I wasn't quite right in my description, but close enough. The bumper has some minor vents through it stock, and the lower slot is full width, and the upper grill is my lot. It's a small car :-D
So in light of that, the lower slot would be shared with brakes, alternator duct, oil cooler, radiator, and the upper grill would be air intake and radiator. OK.
All of this inspired by these photos from a fellow Kiwi:


I don't 100% love everything about it, but it got me thinking, which is never good...
- Radiator
- Oil cooler
- Inlet tract
- Brake ducts
- Alternator duct
Thinking about the KP, and wanting it to look stock on the outside, the layout should roughly be:
- Headlights upper left and right side - unchanged
- Bumper, solid, entire way across at half height - unchanged
- Lower left and right sides, brake ducting - subtle
- Left hand 2/3+ of centre should flow to radiator, though radiator could be inset and of larger size
- Upper half of remaining right hand <= 1/3, air intake for engine
- Half of lower half of remaining right hand <= 1/3, oil cooling
- Other half of lower half of remaining right hand <= 1/3, alternator cooling
Looking at those again, I wasn't quite right in my description, but close enough. The bumper has some minor vents through it stock, and the lower slot is full width, and the upper grill is my lot. It's a small car :-D
So in light of that, the lower slot would be shared with brakes, alternator duct, oil cooler, radiator, and the upper grill would be air intake and radiator. OK.
All of this inspired by these photos from a fellow Kiwi:
I don't 100% love everything about it, but it got me thinking, which is never good...
DIYEFI.org - where Open Source means Open Source, and Free means Freedom
FreeEMS.org - the open source engine management system
FreeEMS dev diary and its comments thread and my turbo truck!
n00bs, do NOT PM or email tech questions! Use the forum!
The ever growing list of FreeEMS success stories!
FreeEMS.org - the open source engine management system
FreeEMS dev diary and its comments thread and my turbo truck!
n00bs, do NOT PM or email tech questions! Use the forum!
The ever growing list of FreeEMS success stories!
Re: Fred's 1983 KP60 Toyota Starlet, take 2!
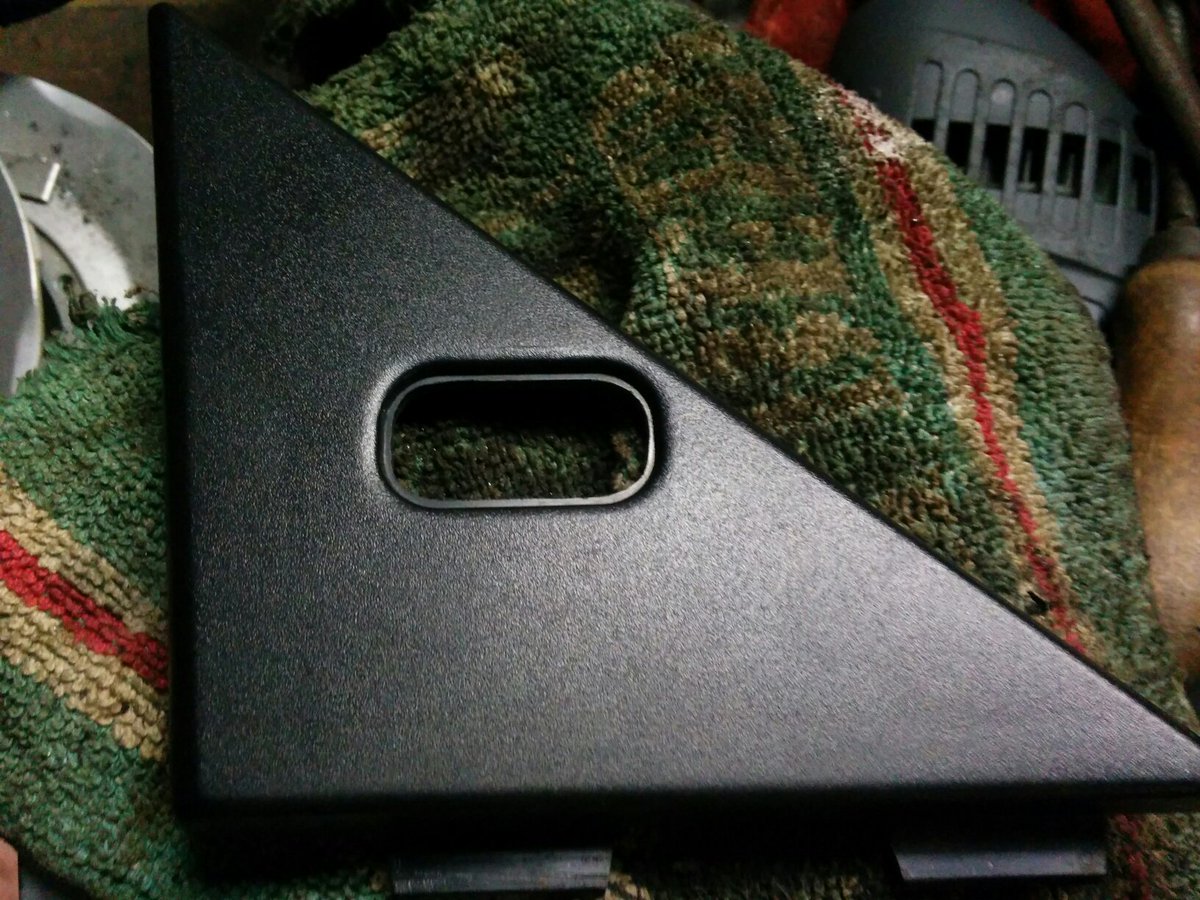
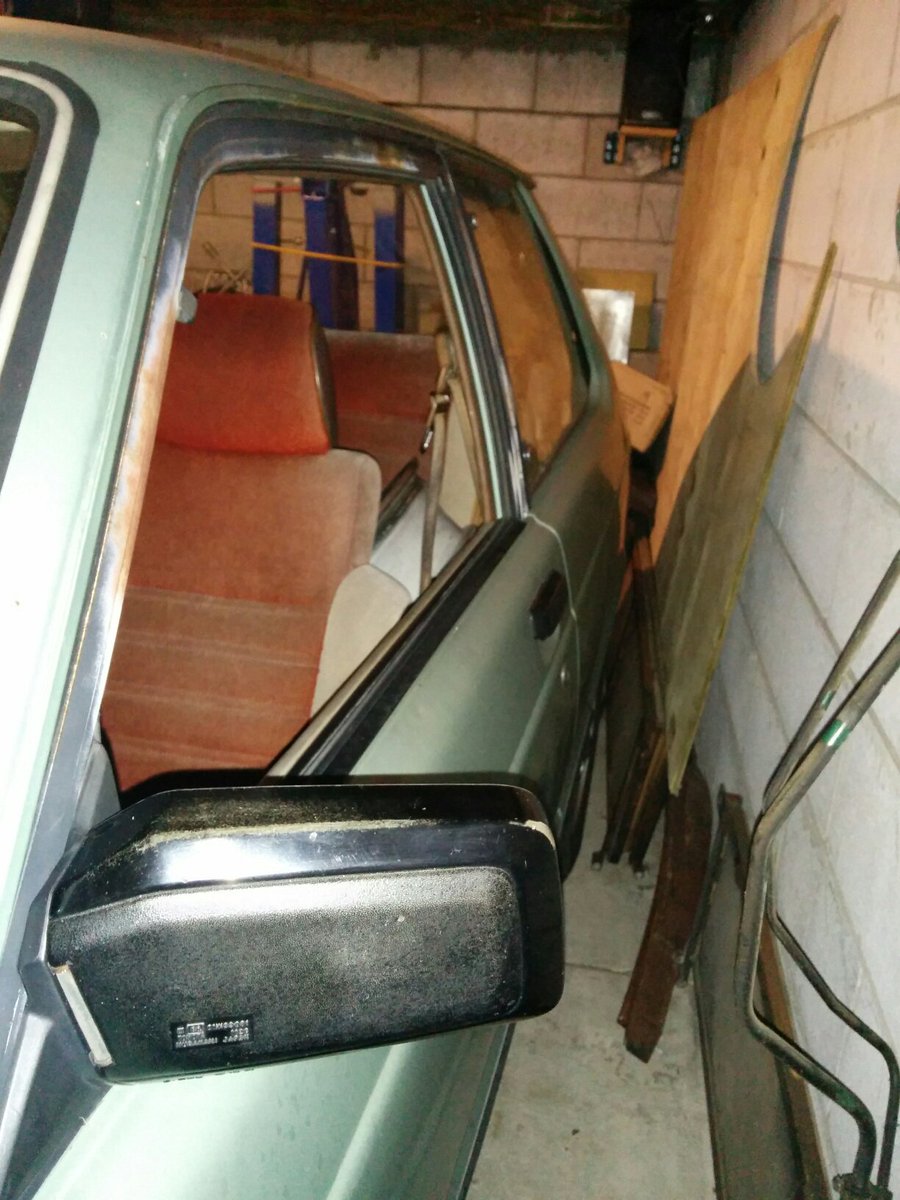
A little interlude of actually doing something to the car before dreaming about how it'll one day be some more:
Can anyone tell me what's missing from this seller's photo?
OK, if you didn't spot it, I'm going to ruin it with some pictures:

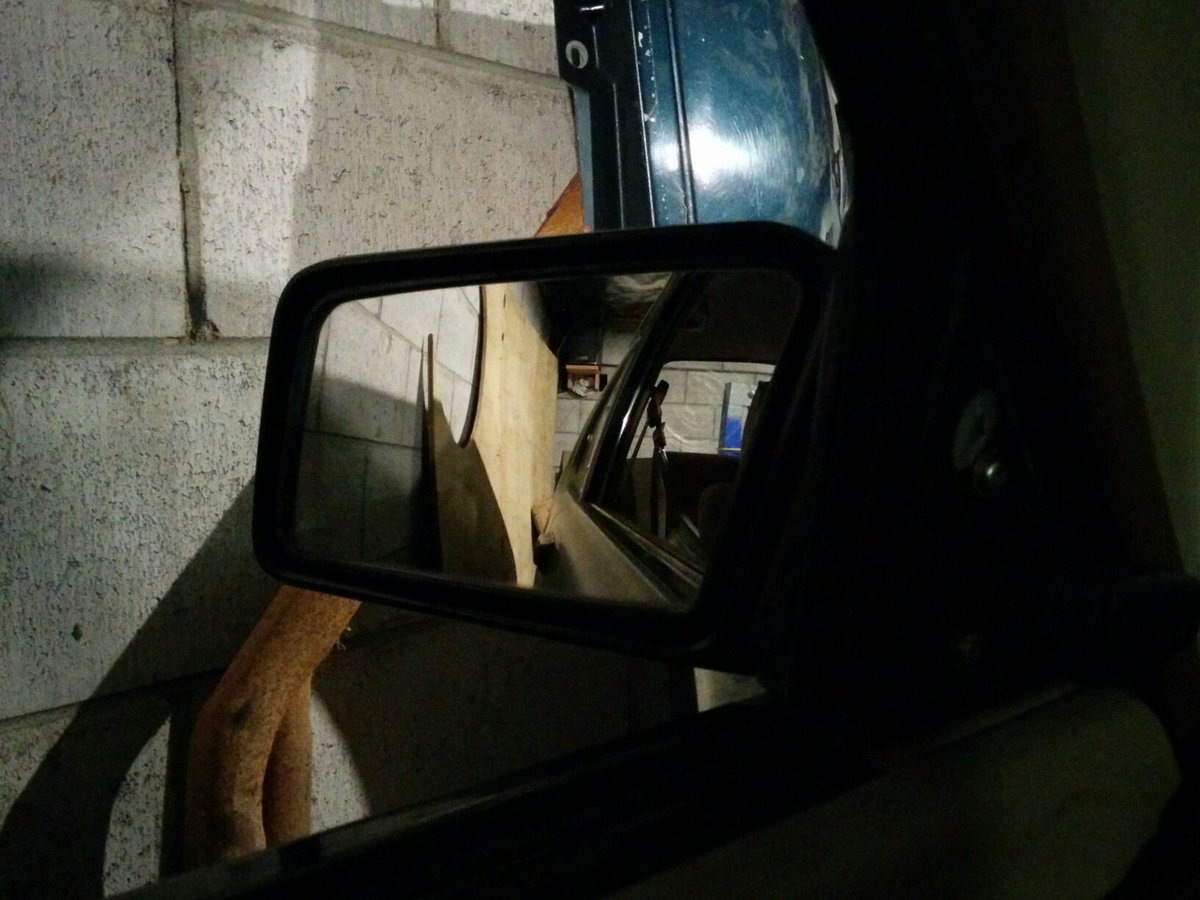

So that's what I got done after stealing my key back from the mrs to photograph my anit seize compounds for that other thread. Didn't take long, and will be much nicer to use in the real world as a result. Obviously the last thing to do one day next week if I'm well behaved is to trim that hole out to match the pattern neatly and put the cover back on. Sadly, the seller sold the other mirror to someone else, and the new left hand one is much nicer than the old right hand one :-D Oh well. Pretty common for people to paint these up. I could do that if the rest of the thing is ever mint enough to care.
Can anyone tell me what's missing from this seller's photo?
OK, if you didn't spot it, I'm going to ruin it with some pictures:
So that's what I got done after stealing my key back from the mrs to photograph my anit seize compounds for that other thread. Didn't take long, and will be much nicer to use in the real world as a result. Obviously the last thing to do one day next week if I'm well behaved is to trim that hole out to match the pattern neatly and put the cover back on. Sadly, the seller sold the other mirror to someone else, and the new left hand one is much nicer than the old right hand one :-D Oh well. Pretty common for people to paint these up. I could do that if the rest of the thing is ever mint enough to care.
DIYEFI.org - where Open Source means Open Source, and Free means Freedom
FreeEMS.org - the open source engine management system
FreeEMS dev diary and its comments thread and my turbo truck!
n00bs, do NOT PM or email tech questions! Use the forum!
The ever growing list of FreeEMS success stories!
FreeEMS.org - the open source engine management system
FreeEMS dev diary and its comments thread and my turbo truck!
n00bs, do NOT PM or email tech questions! Use the forum!
The ever growing list of FreeEMS success stories!
Re: Fred's 1983 KP60 Toyota Starlet, take 2!
Having done 2.5 hours good work, I was granted access to the cave for 30 mins. Which turned out to be 45 mins. And in a few more when I hit submit, 60 mins, or a whole hour. Phases:


I know, amazing. People generations from now will look at this post and think "Shit Fred wasted a lot of time taking and uploading photographs that nobody cares about!" :-D
- Drill https://twitter.com/FredCookeNZ/status/ ... 1196782592
- Cut & test https://twitter.com/FredCookeNZ/status/ ... 0378872832
- File & retest https://twitter.com/FredCookeNZ/status/ ... 5079733248
- Install https://twitter.com/FredCookeNZ/status/ ... 4530096129
- Knob https://twitter.com/FredCookeNZ/status/ ... 8801934337
- Profit https://twitter.com/FredCookeNZ/status/ ... 1726270464
- Post! :-p
I know, amazing. People generations from now will look at this post and think "Shit Fred wasted a lot of time taking and uploading photographs that nobody cares about!" :-D
DIYEFI.org - where Open Source means Open Source, and Free means Freedom
FreeEMS.org - the open source engine management system
FreeEMS dev diary and its comments thread and my turbo truck!
n00bs, do NOT PM or email tech questions! Use the forum!
The ever growing list of FreeEMS success stories!
FreeEMS.org - the open source engine management system
FreeEMS dev diary and its comments thread and my turbo truck!
n00bs, do NOT PM or email tech questions! Use the forum!
The ever growing list of FreeEMS success stories!
Re: Fred's 1983 KP60 Toyota Starlet, take 2!
Inspired by someone else trying a couple of headers and having worse results below 6k RPM with bigger 44.5mm OD headers and better results with 38mm headers, and same for both above 6k, I went down just before bed to do some casual measurements of some factory blacktop parts. Couldn't seem to find this on the interwebs, so here it is from me:
Additionally:
Primary runner length from valve face to merge point:
I don't know the length of the secondaries and don't own any. I think I abandoned some in Christchurch, but they're likely in landfill or China by now, I guess.
- Ports: 33.5mm +/- 0.2mm ID
- Headers: 4:2 38.0mm OD 34.0mm ID, just a hair bigger than the ports
- 1st Merge: 40mm with a step out to 44mm that I think the next step goes into
- IIRC the exhaust is 52mm OD or so? I'd have to check on a car.
Additionally:
Primary runner length from valve face to merge point:
- 80mm + a little from valve to head flange
- 110mm centreline of curve from flange down
- 100mm straight
- 70mm centreline of curve
- 100mm straight to merge point
I don't know the length of the secondaries and don't own any. I think I abandoned some in Christchurch, but they're likely in landfill or China by now, I guess.
DIYEFI.org - where Open Source means Open Source, and Free means Freedom
FreeEMS.org - the open source engine management system
FreeEMS dev diary and its comments thread and my turbo truck!
n00bs, do NOT PM or email tech questions! Use the forum!
The ever growing list of FreeEMS success stories!
FreeEMS.org - the open source engine management system
FreeEMS dev diary and its comments thread and my turbo truck!
n00bs, do NOT PM or email tech questions! Use the forum!
The ever growing list of FreeEMS success stories!
Re: Fred's 1983 KP60 Toyota Starlet, take 2!
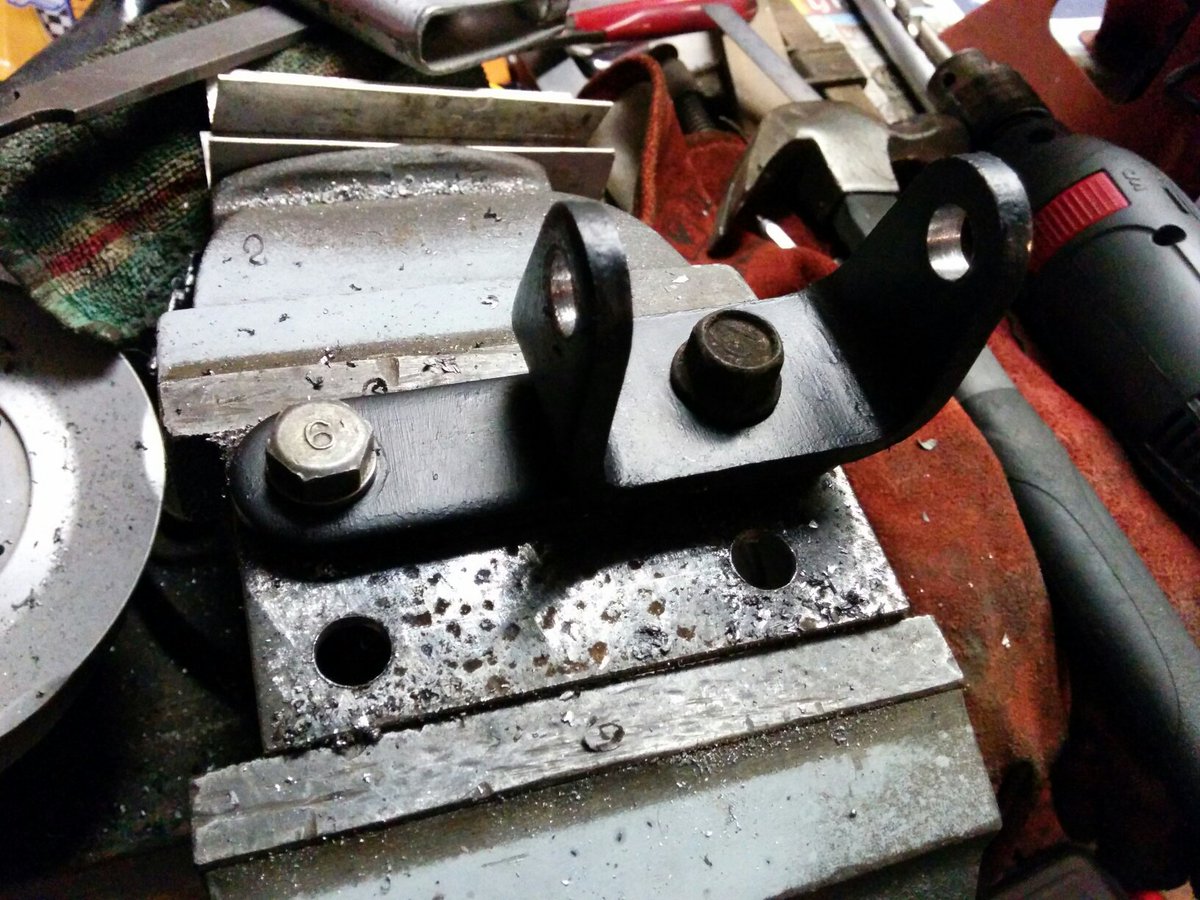
Finally tried on my little alternator bracket and it seems that I still have a little work to do on it. IE, trim the sump lip and make grind down some bolts/nuts/cap screws to be 4 sided.
DIYEFI.org - where Open Source means Open Source, and Free means Freedom
FreeEMS.org - the open source engine management system
FreeEMS dev diary and its comments thread and my turbo truck!
n00bs, do NOT PM or email tech questions! Use the forum!
The ever growing list of FreeEMS success stories!
FreeEMS.org - the open source engine management system
FreeEMS dev diary and its comments thread and my turbo truck!
n00bs, do NOT PM or email tech questions! Use the forum!
The ever growing list of FreeEMS success stories!
Re: Fred's 1983 KP60 Toyota Starlet, take 2!
Yesterday I got something complete and sent out (needs more work again today, but...) and got down into the garage for a bit of KP loving. These are the results:
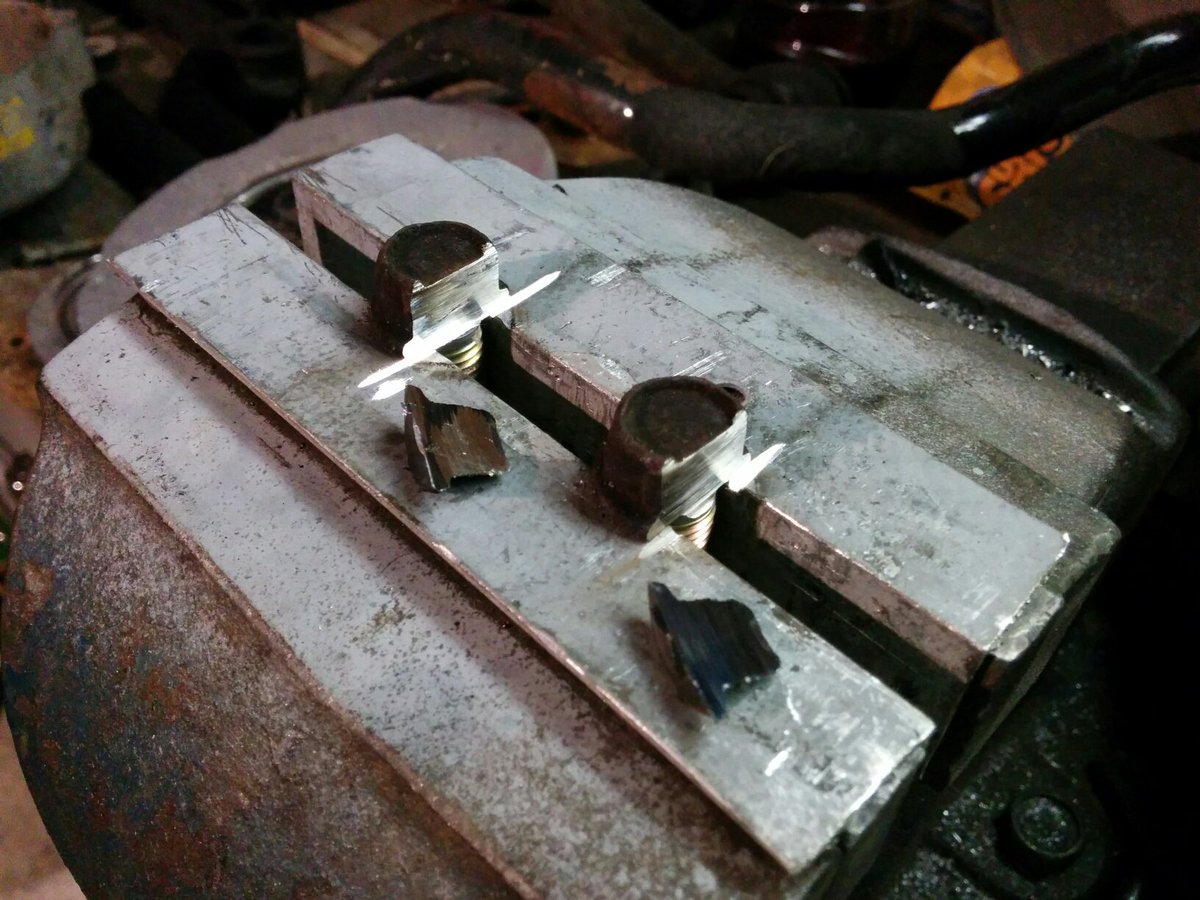
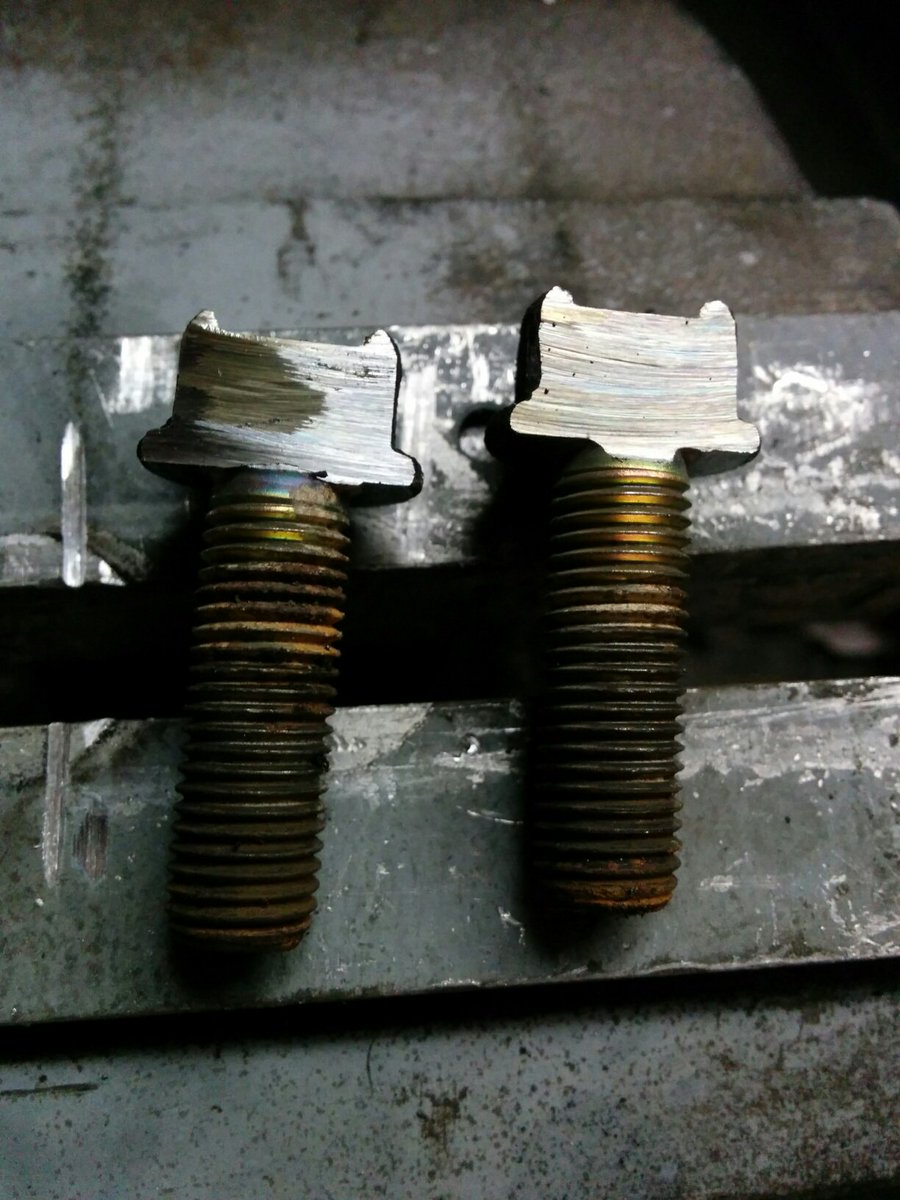


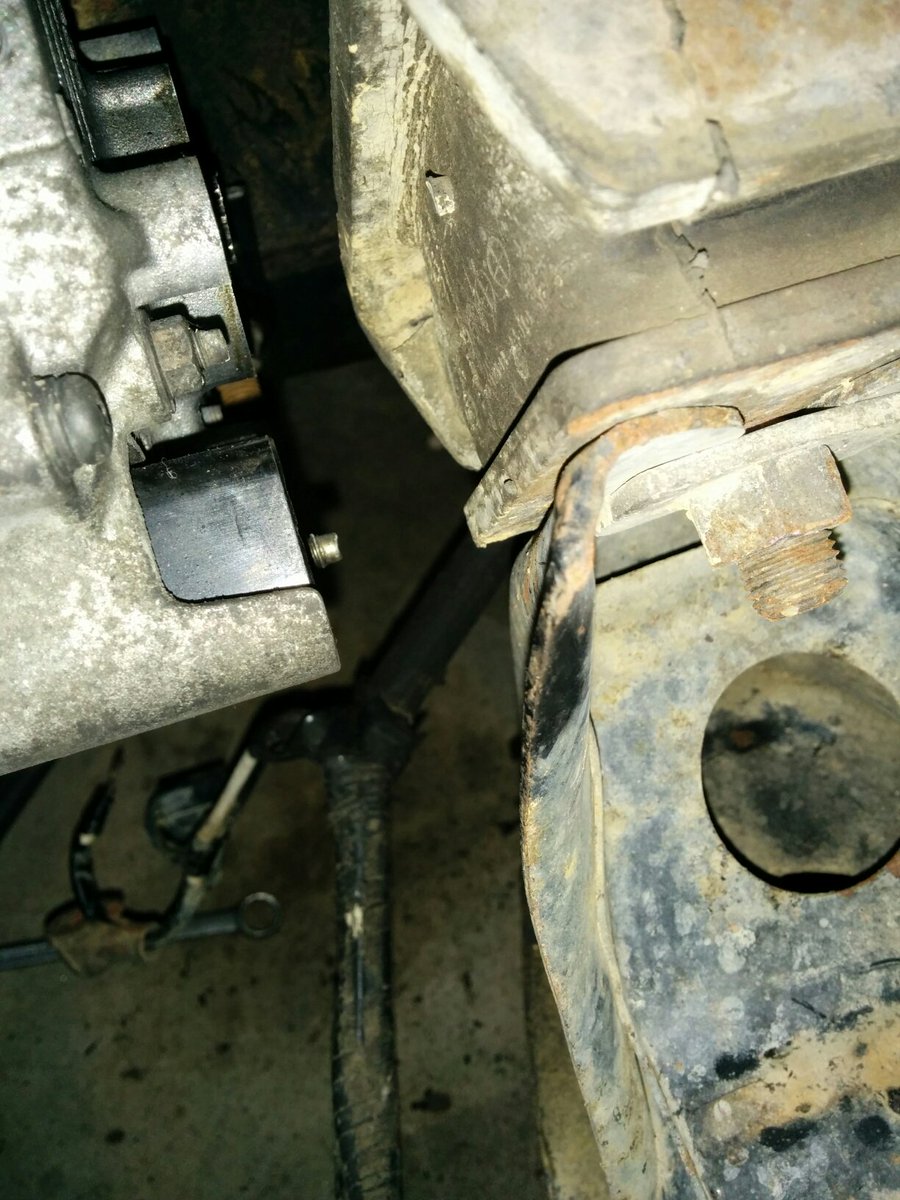
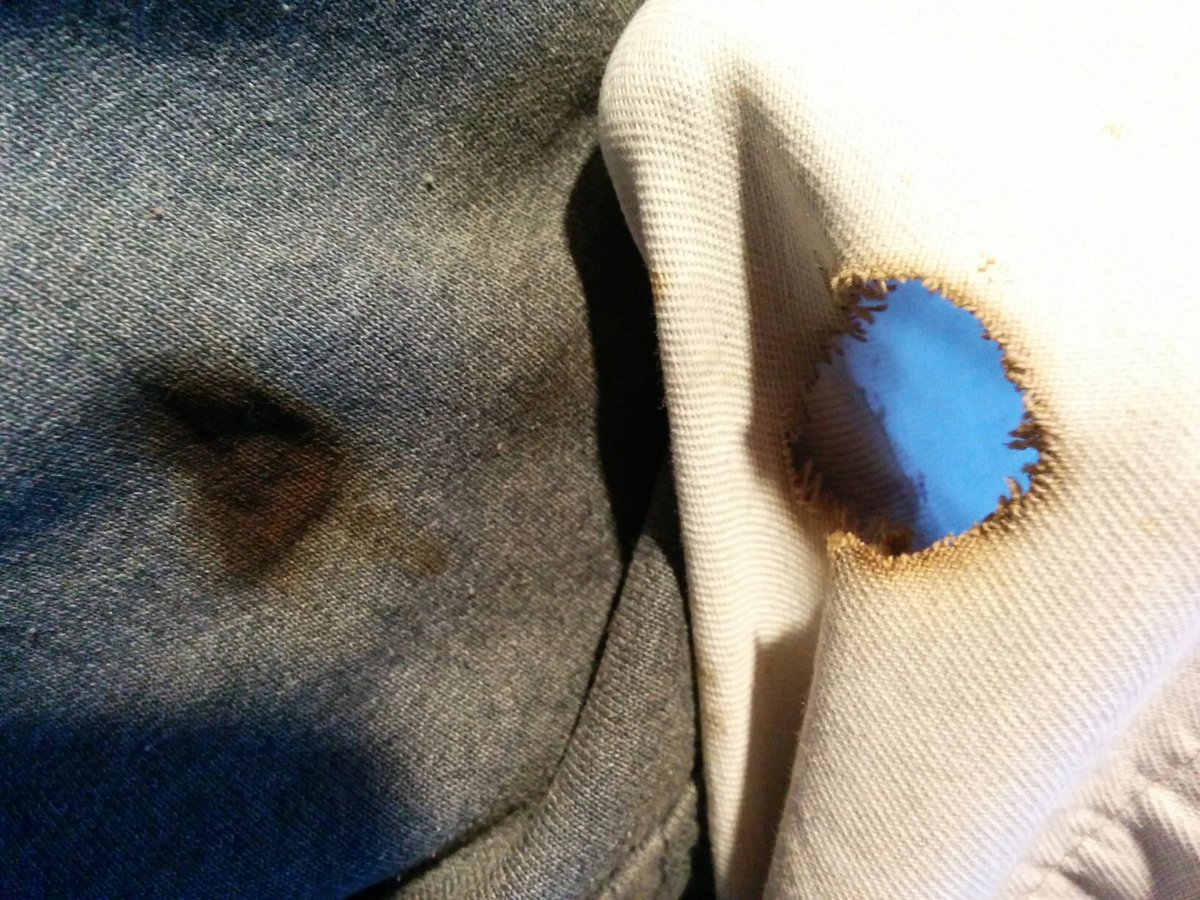

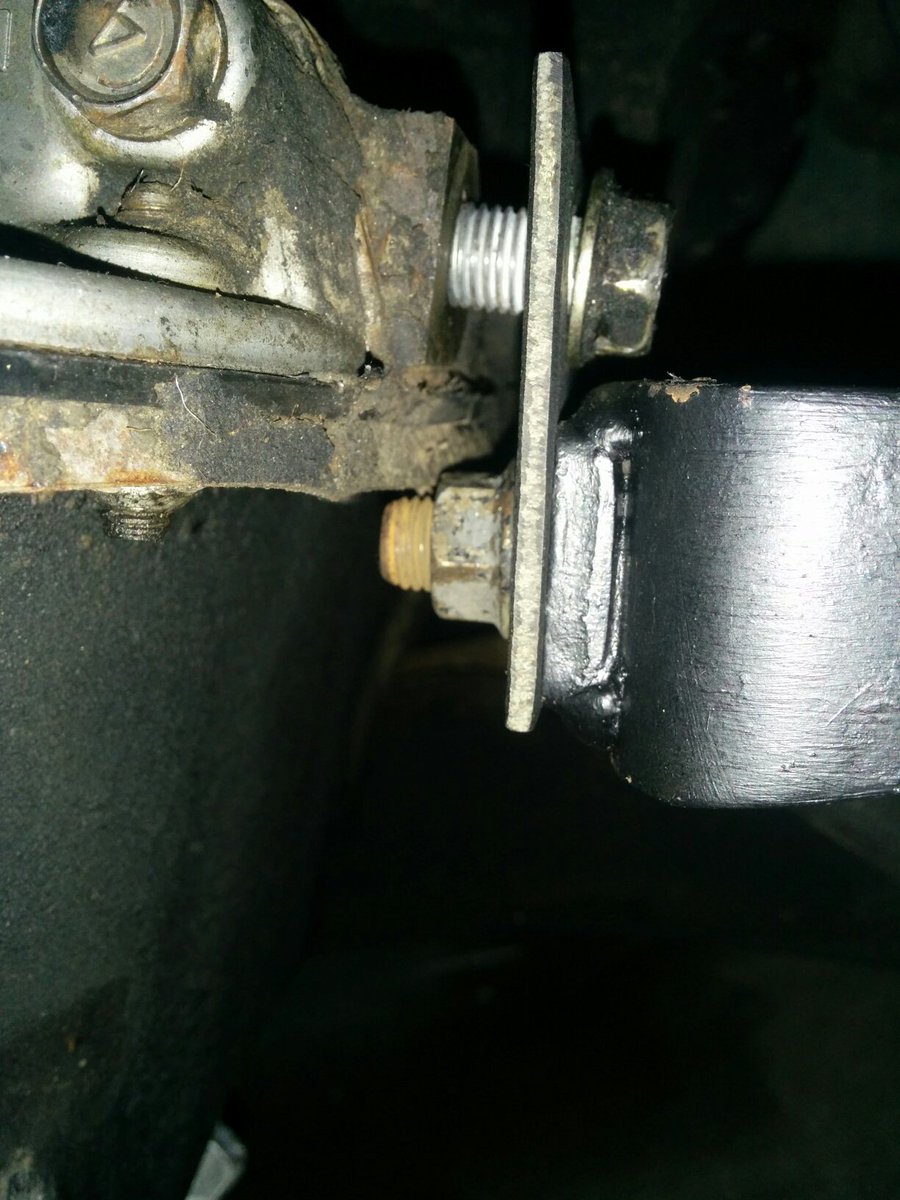
So in summary, i made bolts that fitted, the bracket was perfectly sized, the spacing seems pretty close, the alternator gets a little over half the movement before hitting the block, the connector will be ultra close to the engine mount, and I do not have a connector for it/need to get one. I also caught fire to myself in the process while trying to avoid too many sparks ending up in various vehicle parts.
When I take it off to do the plug I'll also have to take a look at the angle of the bracket as torquing up the lower bolt skews the alternator backward. There might be a bit of adjustment to be had in the mounting to solve that. Over the height of the alternator it was about 3mm at the top. so about 1mm at the mounting bolts would work.
I could also stick some spacers under it in an attempt to gain more range, but I don't think I need it and that'd be kinda ugly.
Right, back to work! :-p
DIYEFI.org - where Open Source means Open Source, and Free means Freedom
FreeEMS.org - the open source engine management system
FreeEMS dev diary and its comments thread and my turbo truck!
n00bs, do NOT PM or email tech questions! Use the forum!
The ever growing list of FreeEMS success stories!
FreeEMS.org - the open source engine management system
FreeEMS dev diary and its comments thread and my turbo truck!
n00bs, do NOT PM or email tech questions! Use the forum!
The ever growing list of FreeEMS success stories!
Re: Fred's 1983 KP60 Toyota Starlet, take 2!
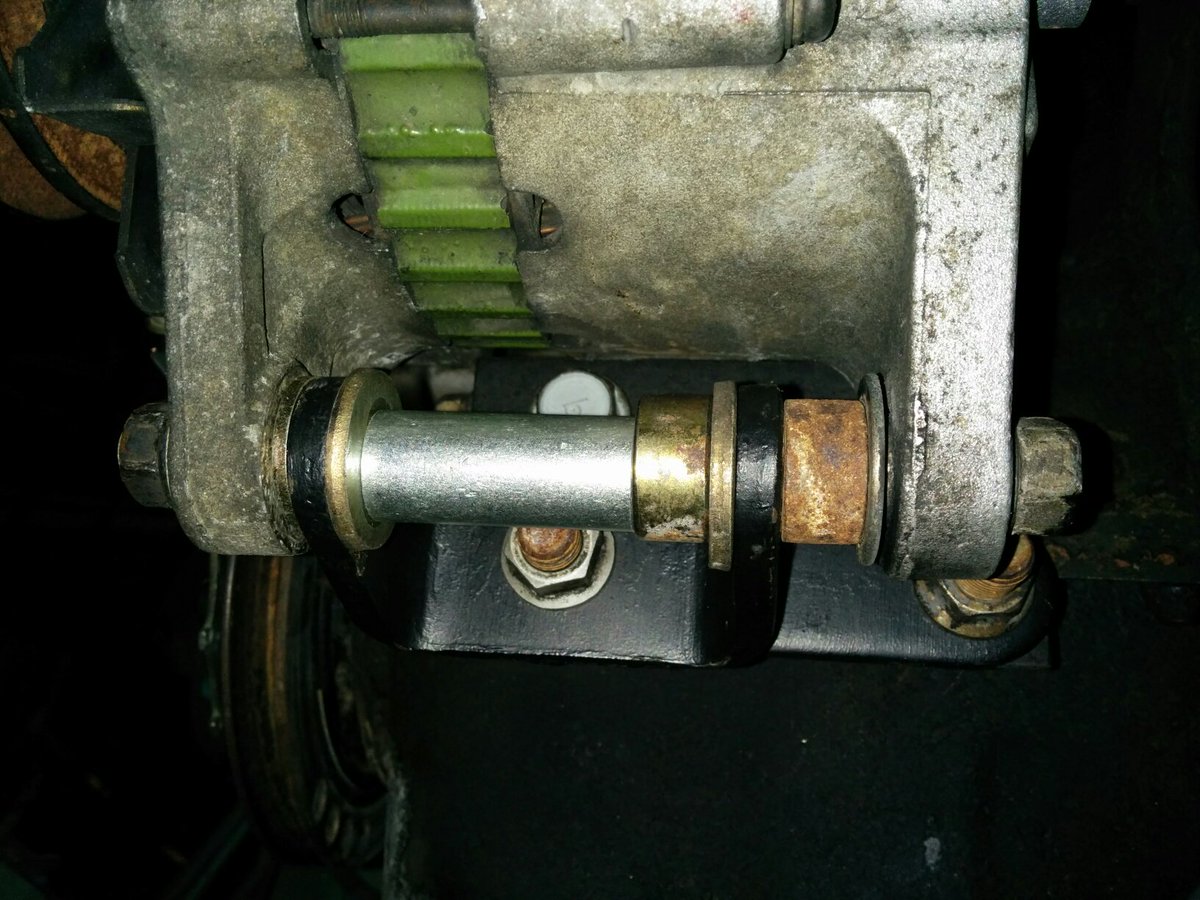
Took a quick break just now and untorqued the lower bolts, gave it a wiggle, torqued them back up again! Perfect :-) Or so it seems. I guess we'll see how the belts last before a final verdict.Fred wrote:When I take it off to do the plug I'll also have to take a look at the angle of the bracket as torquing up the lower bolt skews the alternator backward. There might be a bit of adjustment to be had in the mounting to solve that. Over the height of the alternator it was about 3mm at the top. so about 1mm at the mounting bolts would work.
Belt sizing! I have an 11A0840 as purchased in Christchurch to suit the install at the time, and it looks like it would sit in the grooves and work if you could get it on - but you can't. So then, the size I need is just long enough to get it on, as I have limited adjustment range now. About 40mm of adjustment at the top translates to 20mm at the pulley translates to about 0.707 * 20mm per side, or about 1.414 * 20mm total. Roughly. IE, I've only got about 30mm of adjustment. So how much do I need to get it on? 10mm at the top to get over the water pump, same math, about 15mm longer might get it on. And leave 15mm of adjustment. But alas, there is an 850 and an 865, so 865 it is. This only leaves 5mm of adjustment, however I can slot or extend the bracket if necessary. Or...
Or I could do this to move it out a little more by default. Or both.Fred wrote:I could also stick some spacers under it in an attempt to gain more range, but I don't think I need it and that'd be kinda ugly.
Belt that looks bang on at min adjustment vs belt that is the wrong profile and looks to be about 60mm too far along the adjustment. Maybe I'm being a bit weird on the math. If I'm right about the 13A0940, then 100mm of belt ~= 80mm of adjustment. If so, I have a range of about 50mm of belt to work with, not 30. If that's true the 865 will be about ideal. I guess I'll have to try one out, then.
Belts:
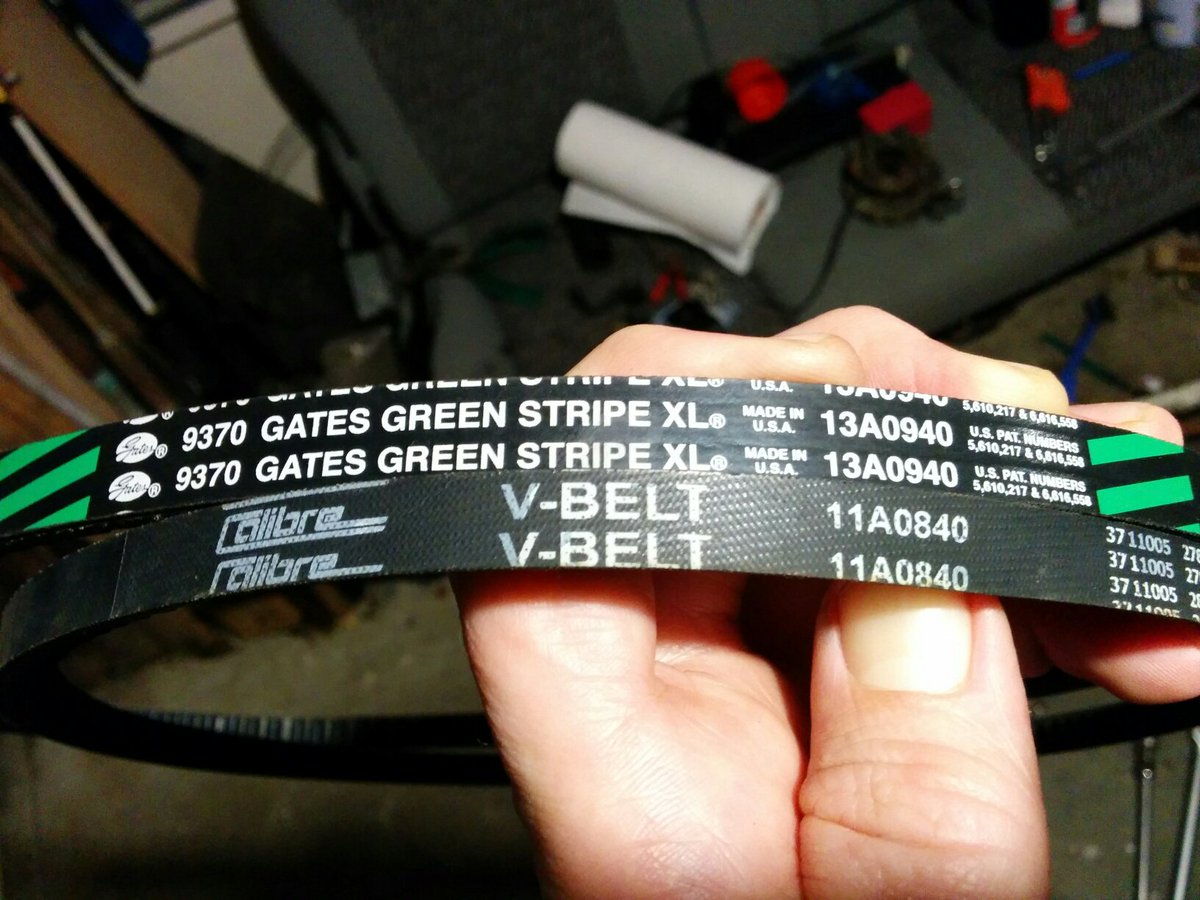
Size reference: http://www.dayco.com.au/products.aspx

DIYEFI.org - where Open Source means Open Source, and Free means Freedom
FreeEMS.org - the open source engine management system
FreeEMS dev diary and its comments thread and my turbo truck!
n00bs, do NOT PM or email tech questions! Use the forum!
The ever growing list of FreeEMS success stories!
FreeEMS.org - the open source engine management system
FreeEMS dev diary and its comments thread and my turbo truck!
n00bs, do NOT PM or email tech questions! Use the forum!
The ever growing list of FreeEMS success stories!